Tag Archives: C4D

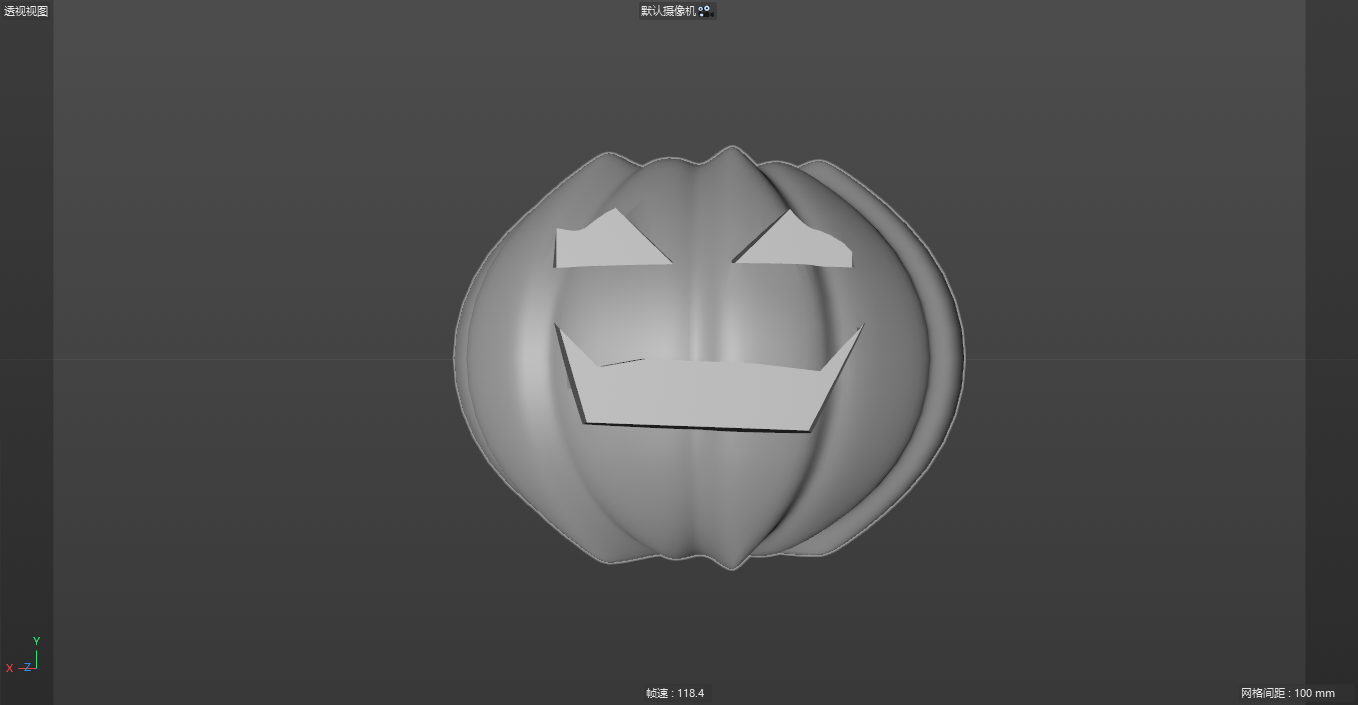
How to Draw the Model of the Jack-o-Lantern by C4D

Halloween is coming! The pumpkin is an iconic symbol of Halloween. Pumpkins are orange, so orange has also become a traditional Halloween color. Carving jack-o-lanterns from pumpkins is also a Halloween tradition that also dates back to Ireland. Legend has it that a man named Jack was so miserly that he couldn’t enter heaven after death, and because he made fun of the devil he couldn’t enter hell, so he could only wander around with a lantern until Judgment Day. Thus, Jack and the jack-o-lantern became symbols of the cursed wandering spirit. In order to scare away these ghosts on Halloween, turnips, beets or potatoes are carved into scary faces to represent Jack with a lantern, which is the origin of the Jack-o’-lantern. When the Irish moved to the United States, they began to carve with pumpkins, which are more abundant than turnips in the American fall. Now, if people hang jack-o-lanterns in the windows on Halloween night, it means that those in Halloween costumes can knock on the door for candy.

Today we are going to share how to use C4D to draw the model of the jack-o-lantern.
1. First, we build a sphere and change the sphere into 12 segments. 
2. Turn the sphere into an editable object and press the shortcut key C. Change to face mode and select the top face. 


3. Use internal extrusion, shortcut key I, to extrude the empty hole above. 
4. Select all the faces (CTRL+A), and then use Extrude (D) to extrude a face. Remember to tick Create cap. 

5. We select an edge every other.
6. Then we use the chamfer function (M, S) to chamfer the corner and turn off the subdivision. 
7. We select another edge that was not selected before. 
8. Repeat step 6. 


9. We add a subdivision surface to the sphere. If you think the pumpkin is not flat enough, you can use T to shrink it inward. 
10. We use two cubes as the eyes of the pumpkin, which can be switched to other views. 
11. We turn the two cubes into editable objects, switch to point mode, select these points, and pull down. 
12. Using the spline brush tool, draw the pumpkin’s mouth. 


13. Extrude the splines and align them with the eyes.
14. Turn the mouth into an editable object and merge it together.
15. Merge the two eyes and mouth together.
16. Then use the Boolean tool to insert the eyes and mouth into the previous pumpkin.  That’s it!

MORE GOOD IDEAS HERE.
Sharing is Caring:

How to Draw a Realistic Fan with C4D

Electric fan, referred to as electric fan, is a household appliance that uses a motor to drive the fan blades to rotate to accelerate the circulation of air. It is mainly used for cooling and relieving heat and circulating air. Widely used in homes, classrooms, offices, shops, hospitals and hotels and other places.

Today we use C4D software to draw a realistic fan. First of all, you can take photos of fans from all angles on the Internet or in your own home, so as to make fans easier.
1. We can start from the middle position of the fan, as shown in the figure, first make the axis position of the fan.
2. Then we make the shaft wheel of the fan as shown. 
3. Put a protective cover on the axle wheel. Of course, these are all details, you don’t need to be so meticulous. 
4. We make the fan blades on the protective cover. The fan blades of the fan are curved. 
5. Let’s add a circle around the fan blade as a protective layer for the fan blade. 
6. Make the protective cover of the shell as shown in the figure. 
7. Add a protective cover. 
8. Let’s add a layer of measures to what is shown in the picture. 
9. Then there are outer measures. 
10. Don’t forget the measures section in the middle. 
11. Having done the previous part, let’s add a layer of measures to the latter part. 
12. As before, perfect the following measures. 
13. After the whole upper part is finished, we start to make the pole of the electric fan. 
14. Make the bottom disc of the pole as well.
15. Of course, we can also do some details and make small cushions at the bottom.  16. Then we use subdivision surface to make the whole fan more perfect. 
17. Let’s make a scene, you can put some sundries such as ice cubes in the scene. 
18. Adjust the angle, turn on the lights, and set the renderer. Wait for rendering. 
19. A finished realistic fan rendering is ready.  Enjoy!

MORE GOOD IDEAS HERE.

Sharing is Caring:

Step by Step Tutorial to Create a Concept Deer with C4D

The essence of C4D software is a 3D design software. As long as it is involved in the production of 3D scenes, products, and visual effects, C4D can be competent. At the beginning of C4D’s existence, it was produced for the later stage of film and television. In the field of film and television design, it is mainly used to build three-dimensional scenes, create character models, and interpret animation ideas…
Today we will use C4D to make a concept deer.


1. First, we use the terrain tool in C4D to build a terrain.
2. Use the FORESTER plug-in to make several different grasses. 
3. Use the clone tool to clone the grass made before, and add random effects. 
4. Making a terrain. Placed behind the previous terrain. 
5. Continue to use the FORSTER plugin to make several trees. 
6. Use the same method of cloning to clone trees, remember to use random effects. Make sure the trees don’t look regular. 


7. We choose several different trees and place them in the woods. 
8. We make or download the model of the deer and place it in the forest. 
9. We use a sphere to make the moon. 
10. Adjust the camera and render settings. Remember to use the fog effect. 
11. A rendering of a mysterious concept deer is ready.  Have fun!

You may also like: AI for Making Flat Style Bottle Illustration

MORE GOOD IDEAS HERE.

Sharing is Caring:

How to Design a Keyboard by C4D and PS.

Today we are going to design a keyboard that is realistic. The tools we need are C4D and PS. A keyboard is an instruction and data input device used to operate computer equipment, and also refers to a group of function keys (such as typewriters, computer keyboards) that are arranged to operate a machine or equipment through a system. In simple terms, a keyboard is an input device for a computer, consisting of an array of key switches.

1. First, we use C4D to make the model of the keyboard. First of all, we first make a bottom axis of the keyboard, because the bottom axis of the keyboard is almost the same, so we only need to do one, and the others can be copied.


2. We copy the finished bottom axis into several pieces and sort them according to the keyboard order.

3. In order to pursue the details, we will also make the axis of the keyboard. And it is arranged according to one axis of each bottom axis. 
4. We insert the shaft into the middle of the finished bottom shaft.
5. After doing this, we also need to make the keycaps of the keyboard. And also sort by sort. 
6. Let’s hide the axis series first. We make a base according to the appearance of a real keyboard. At this time, we can refer to the real keyboard to make the base. 
7. Then we put the finished shaft series into the base and adjust the position appropriately. Of course, everything is in the calculation. 
8. We will perform subdivision surface operations on these well-made parts. 
9. Next, we should use PS software to make the letters on the keyboard. At this time, you can export the UV texture map and put it into PS. 
10. We will fill in the letters in the UV texture map in the actual order. And export black and white images.  11. We put the finished keyboard on a plane in C4D.
12. We set up the light and put the previous black and white image into the material. 
13. Adjust the angle of the camera to find the one you need. 

14. You can adjust different lights, angles, and various rendering values ​​to achieve your ideal look. Of course, on this basis, you can add some breathing lights, or decorative lights.

Now that you have finished designing your own keyboard, have fun!

MORE GOOD IDEAS HERE.

Sharing is Caring: