Creating your own animal hatching craft is a delightful DIY project that promises hours of fun and creativity. With just a few simple materials and easy-to-follow steps, you can bring adorable little creatures to life, nestled within colorful hatching eggs. Here’s a step-by-step guide to help you embark on this enjoyable DIY Animal Hatching crafting journey:
Materials Needed:
Two sheets of white paper
Coloring materials (markers, crayons, or paint)
Scissors
Glue
Wooden sticks
Optional: Additional decorations like googly eyes, felt, or stickers
Instructions:
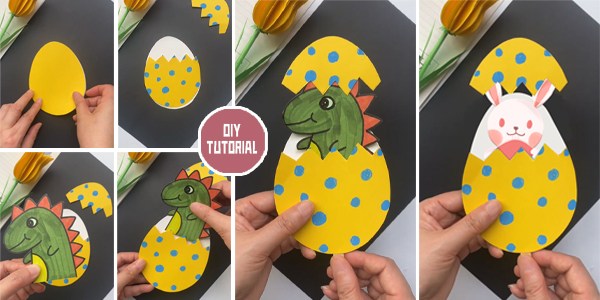
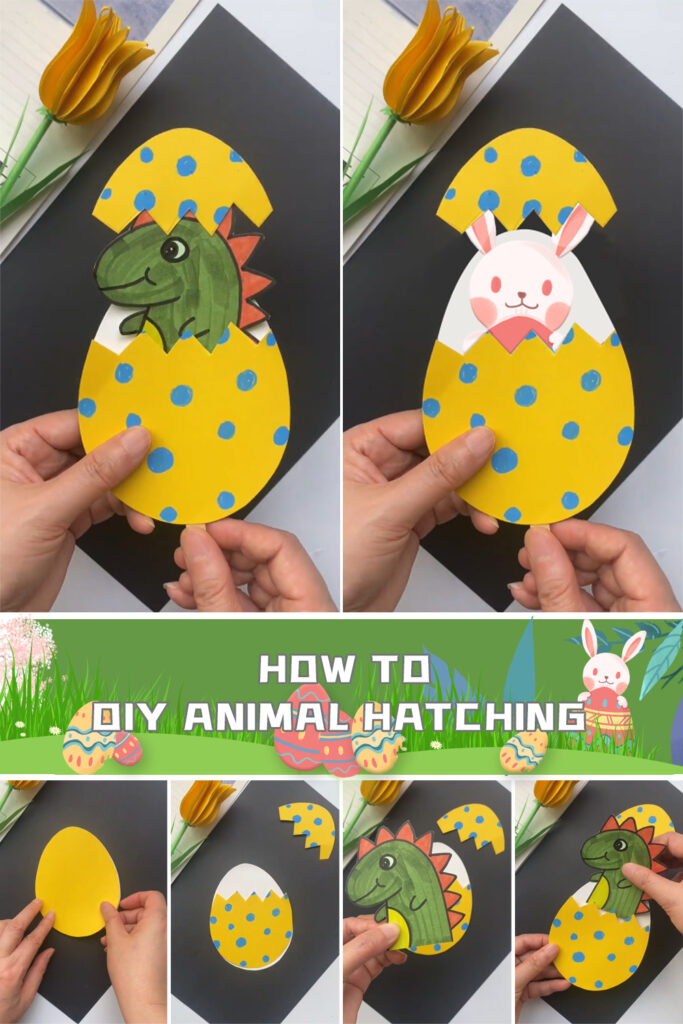
1. Create Egg Shapes: Begin by cutting out egg shapes from the two sheets of white paper. You can refer to the templates provided in the link ( https://www.igoodideas.com/diy-easter-3d-egg-template/)for inspiration. Once you have your egg shapes, use coloring materials to decorate one of the eggs with vibrant hues. Let your creativity soar as you add patterns, designs, or even draw intricate details on the egg.
2. Cut Zigzag Lines: On the colored egg, carefully cut zigzag lines around the edges to simulate the cracking of the eggshell. These jagged lines will add a touch of realism to your hatching egg.
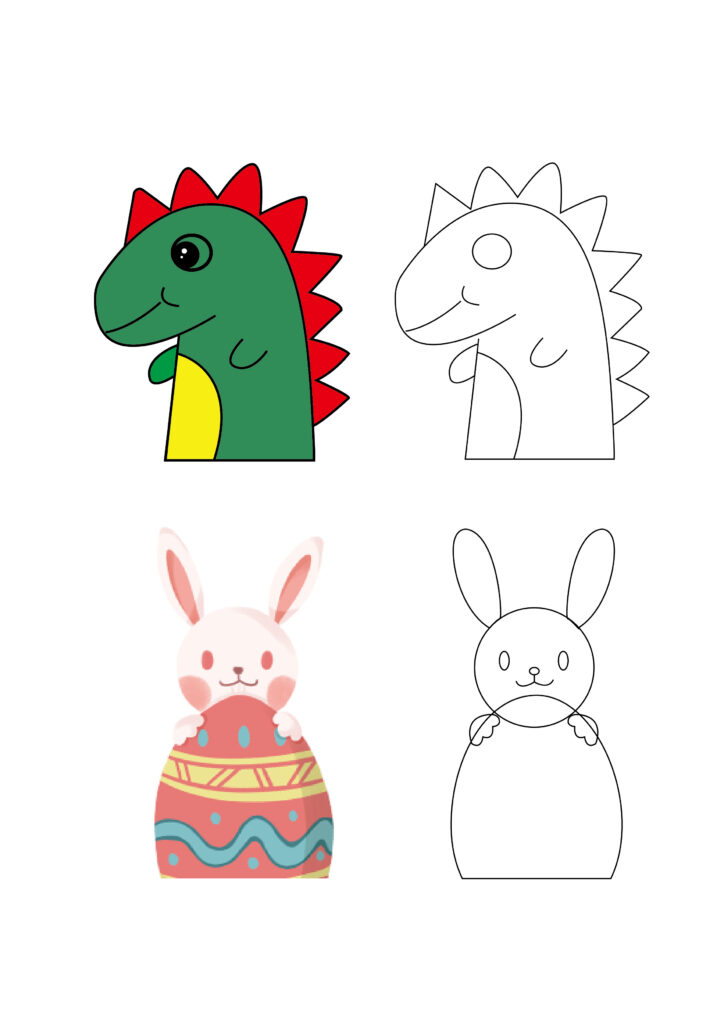
3. Cut Out Animal Shapes: Using the second sheet of paper, cut out the shape of your favorite animal. You can choose from suggested shapes like dinosaurs or rabbits, or let your imagination run wild and create your own animal design. Once cut out, you can also decorate the animal shape with colors, patterns, or facial features.
4. Attach Animal to Stick: Take a wooden stick and apply glue to one end. Then, firmly attach the animal shape to the glued end of the stick. Allow the glue to dry completely to ensure a secure bond.
5. Glue Eggs Together: Apply glue along the edges of both egg shapes and carefully press them together, ensuring they align perfectly. This will create the illusion of a single egg with a cracked top.
6. Insert Stick Through Egg: Insert the wooden stick with the attached animal through the center of the hatching egg, positioning it to appear as though the animal is emerging from the cracked shell.
7. Glue Egg Top and Animal Together: Apply glue to the top half of the cracked eggshell and carefully press it against the animal shape, securing it in place. Ensure that the egg top aligns seamlessly with the cracked edges to maintain the illusion of hatching.
8.Add Optional Decorations: Get creative and add any additional decorations or embellishments to your hatching animal craft. Googly eyes, felt accents, or stickers can enhance the personality and charm of your creation.
With these simple steps, your DIY animal hatching craft is complete! Display your adorable creation proudly or gift it to a friend or loved one to spread joy and creativity. Whether you choose to craft a fierce dinosaur bursting from its shell or a cute bunny peeking out, this project is sure to bring smiles and spark imagination. Enjoy the process of crafting and let your creativity soar as you bring these charming creatures to life!