Crafting your own 3D Easter eggs is a delightful way to usher in the joy and festivity of the season. With our DIY Easter 3D Egg template, you can easily create charming decorations that will add a whimsical touch to your home or Easter celebrations.
Our template provides a simple yet effective guide for crafting your own 3D Easter eggs. Whether you’re an experienced crafter or new to the world of DIY, our template offers easy-to-follow instructions that will ensure your creations turn out beautifully.
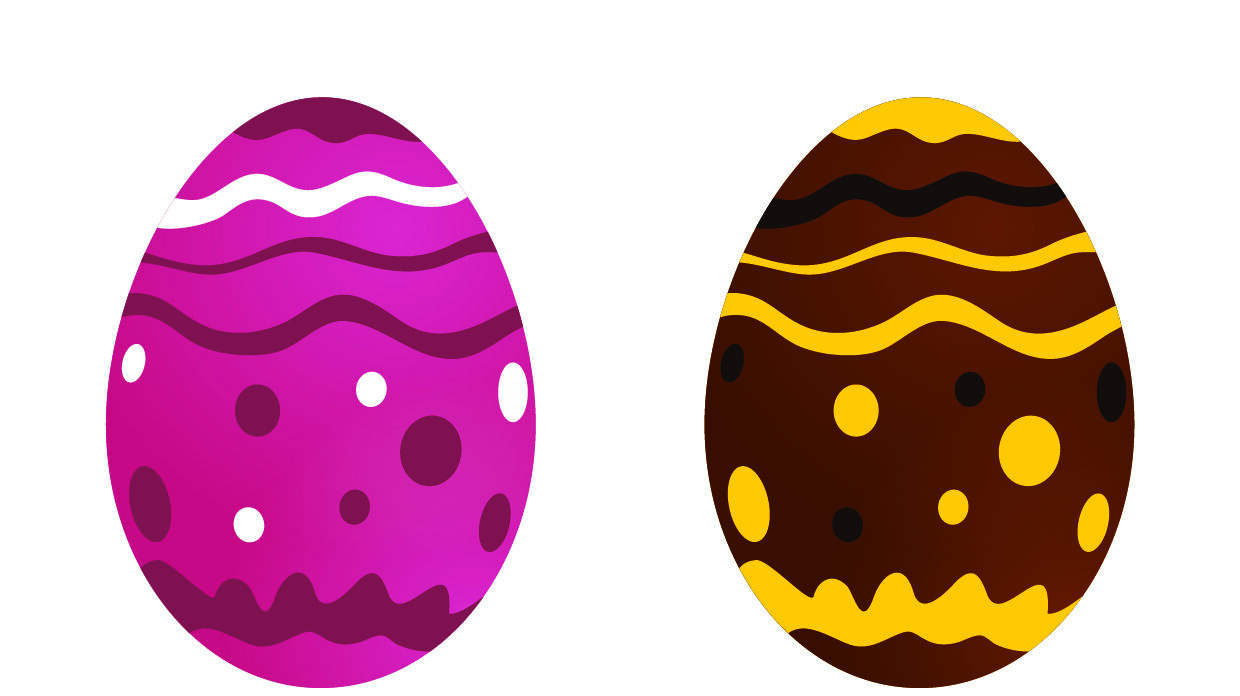
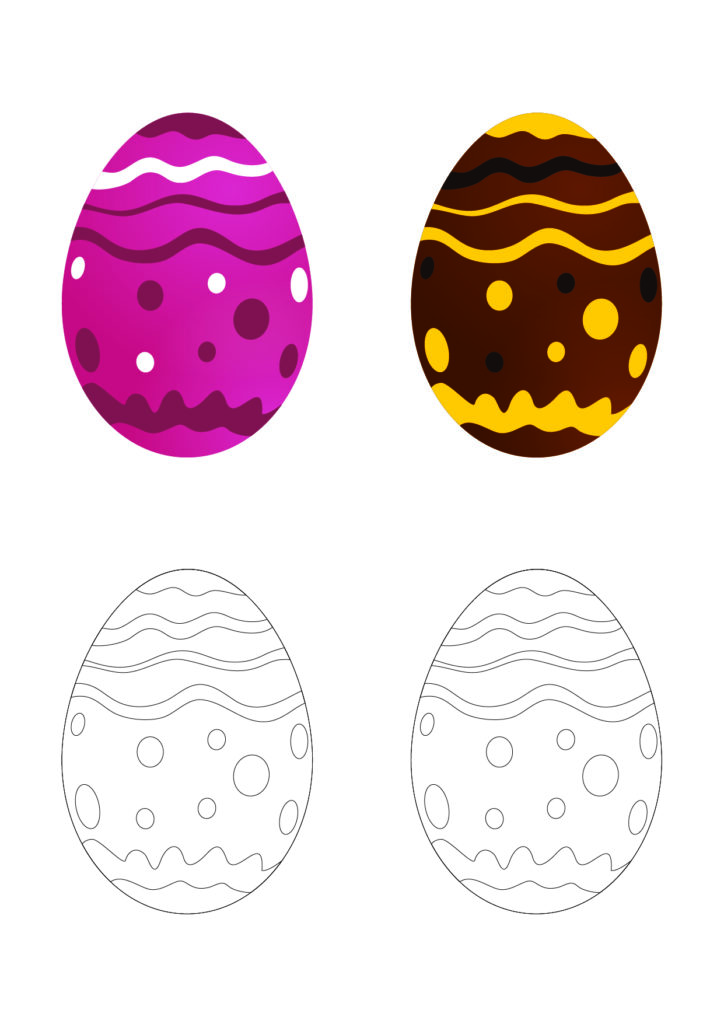
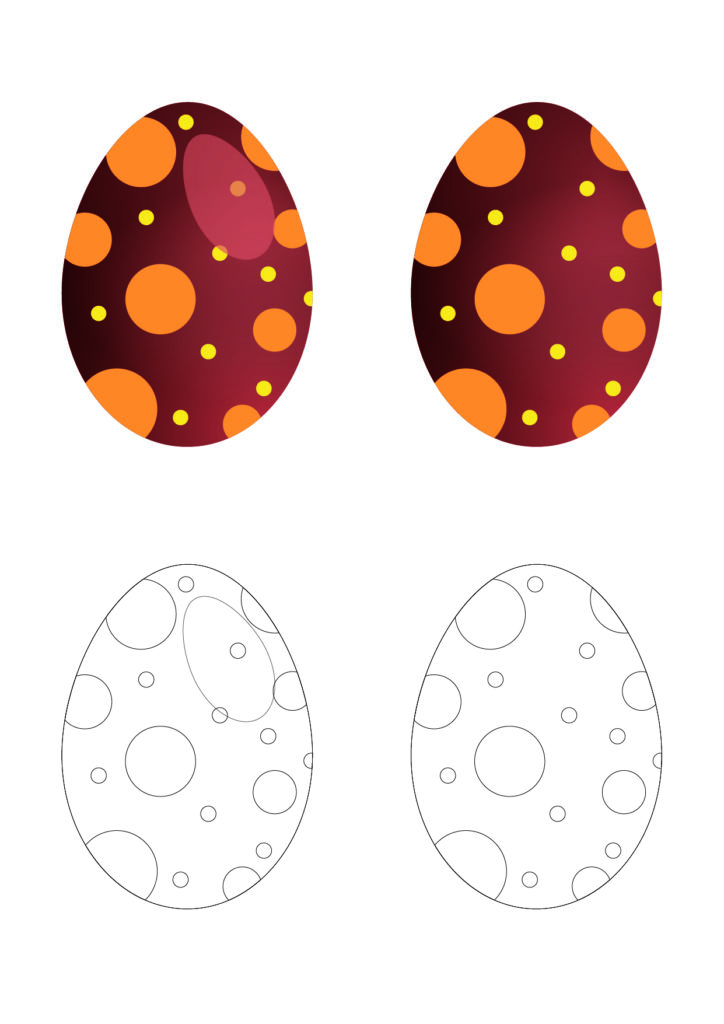
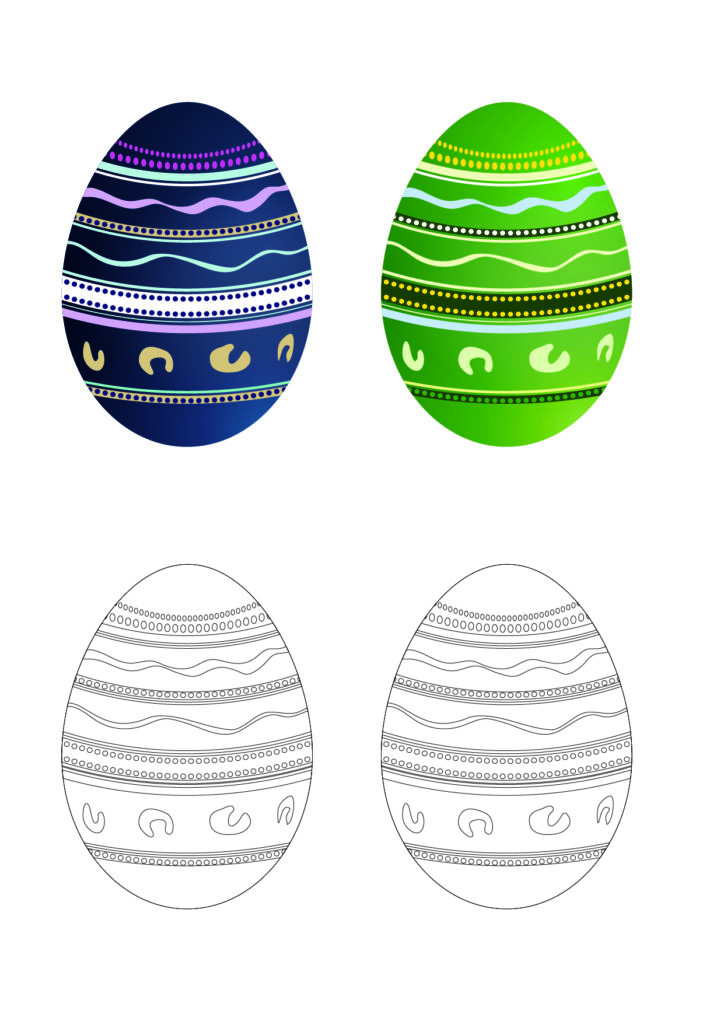
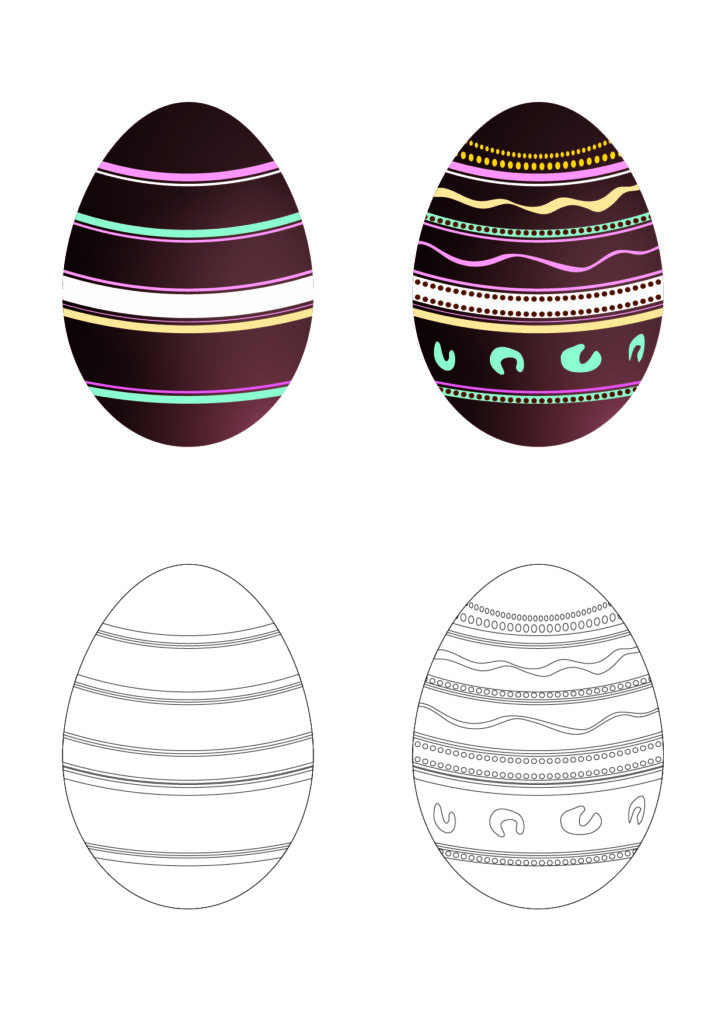
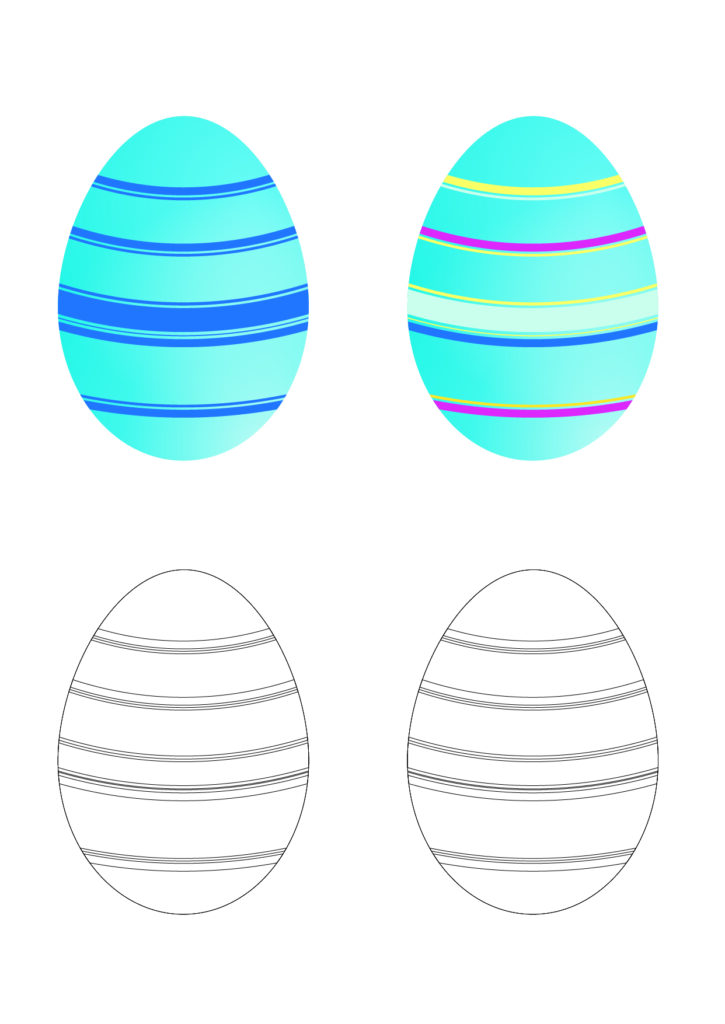
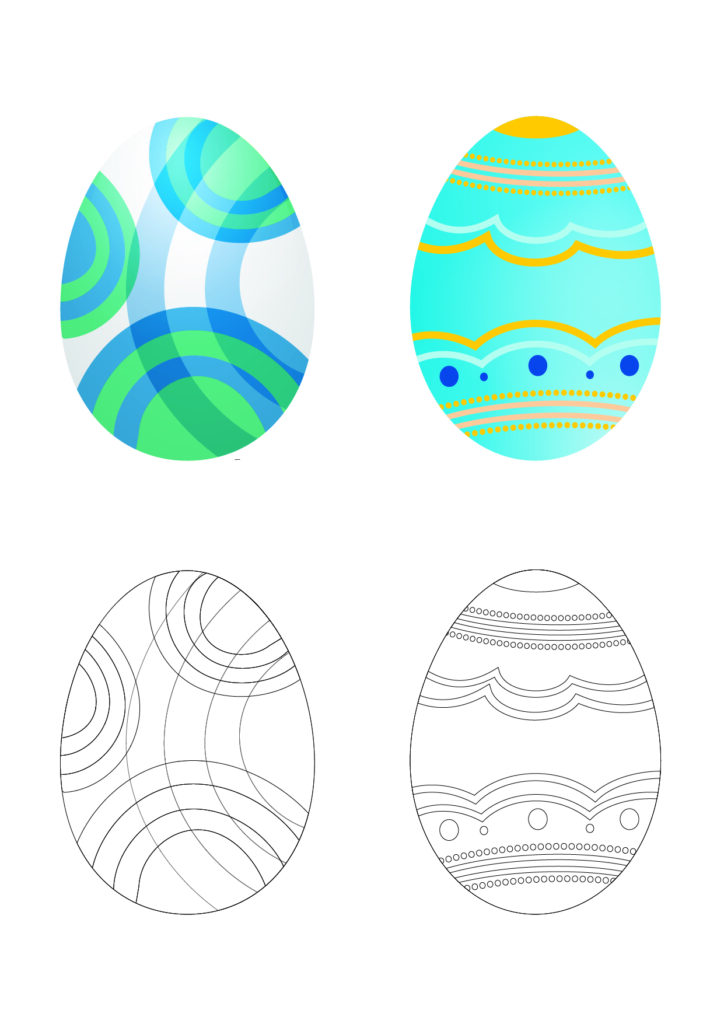
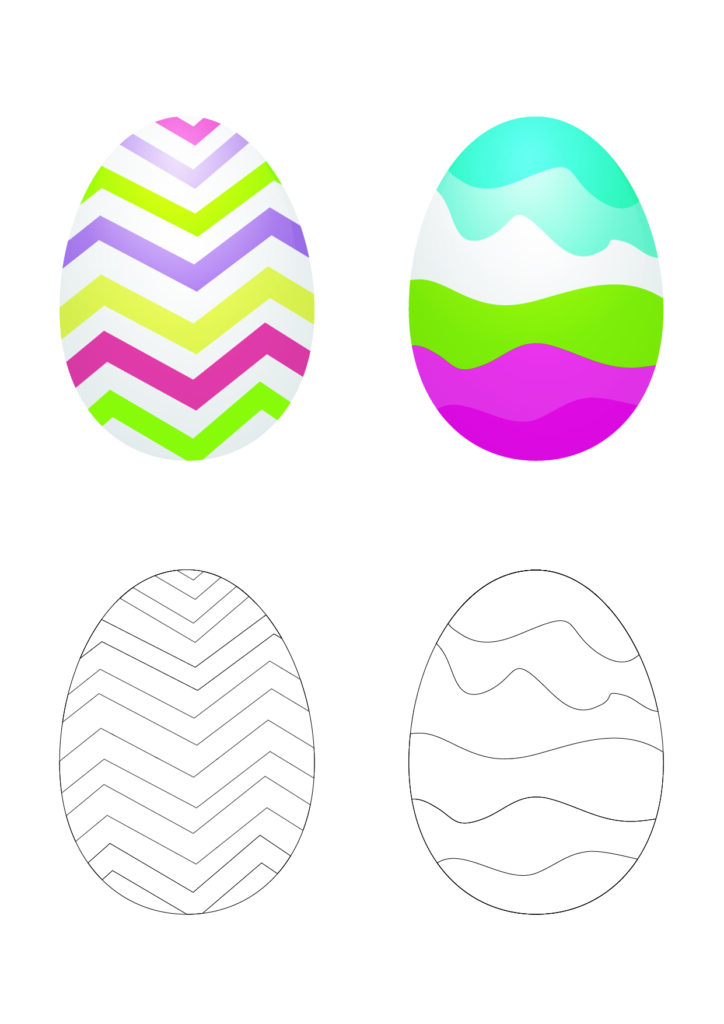
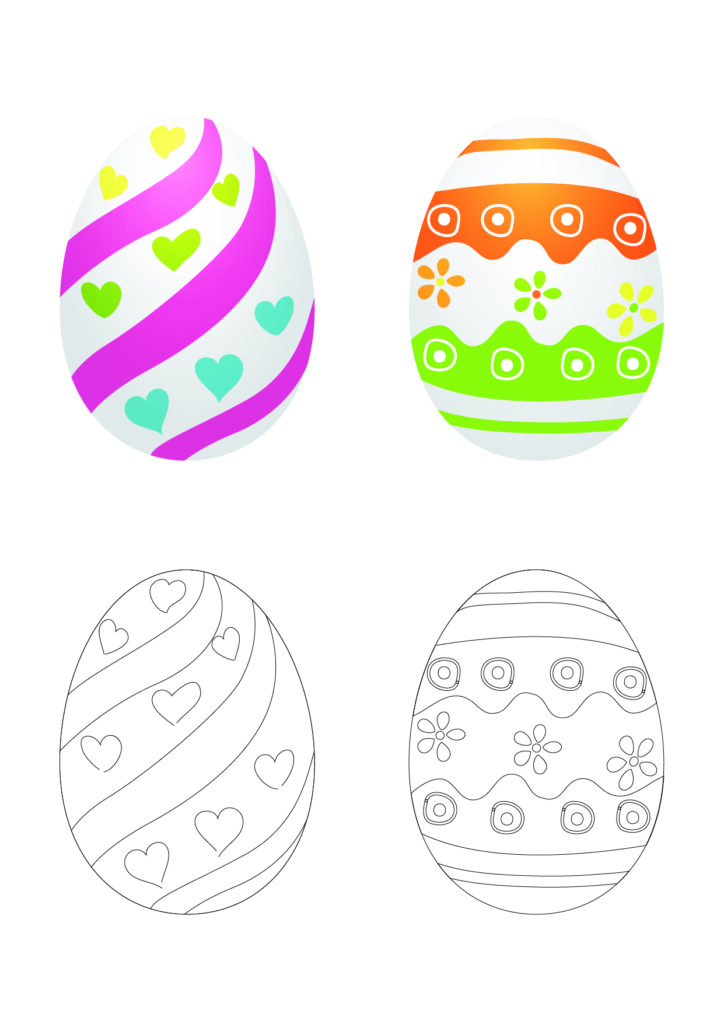
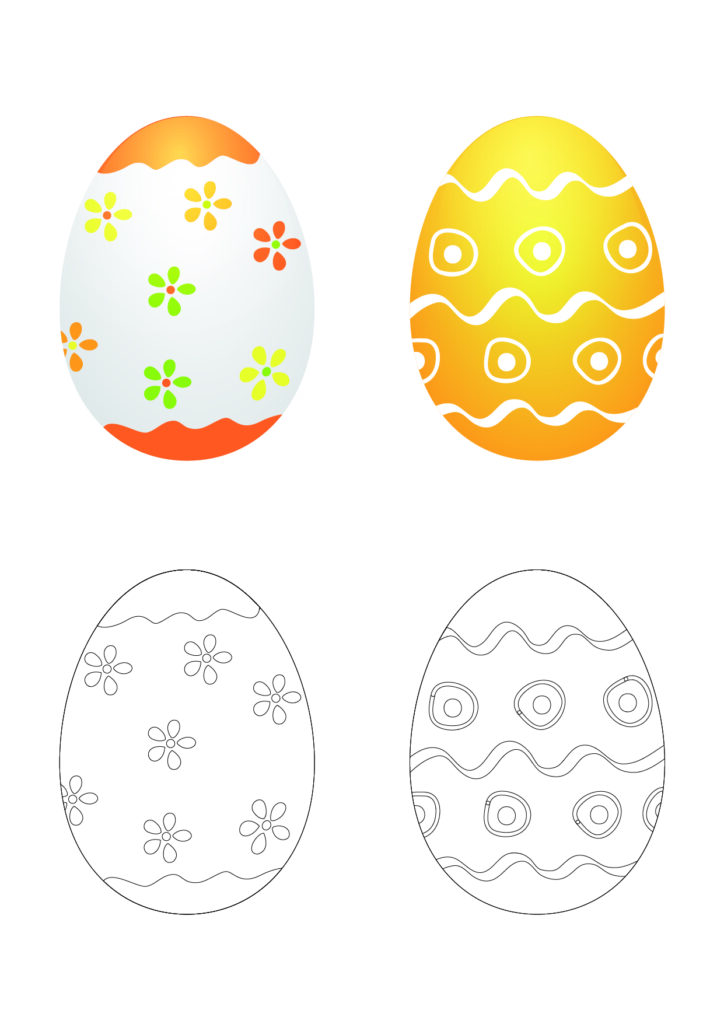
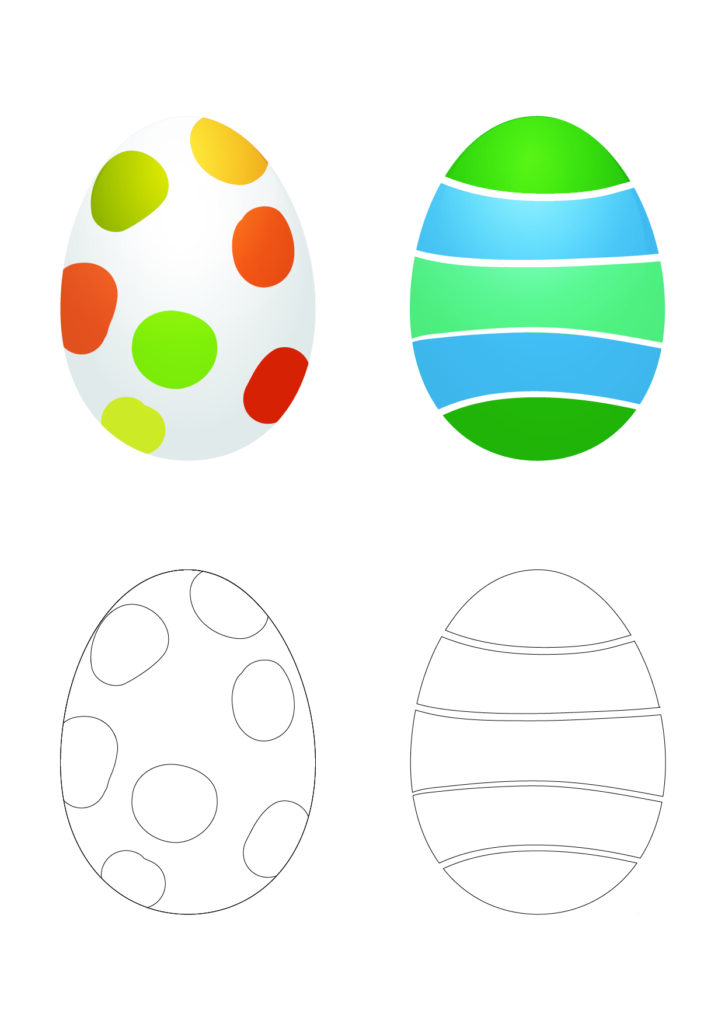
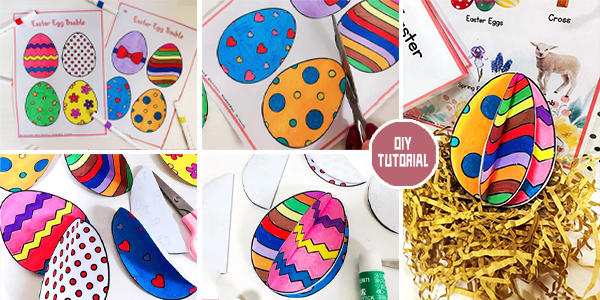
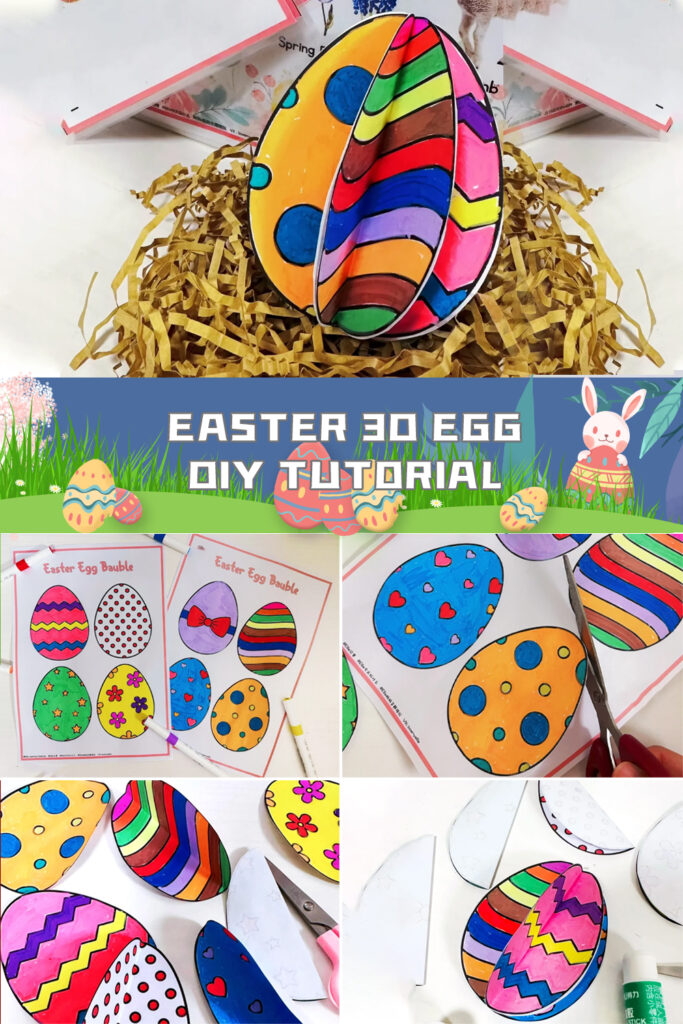
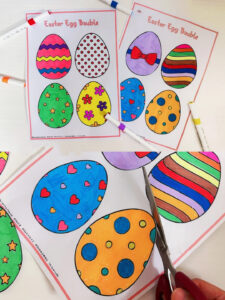
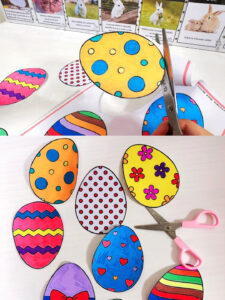
To get started, simply download and print our DIY Easter 3D Egg template. Once printed, cut out the egg shapes using scissors, making sure to follow the lines carefully for smooth edges and even shapes. With eight egg shapes in total, you’ll have plenty to work with as you bring your 3D Easter eggs to life.
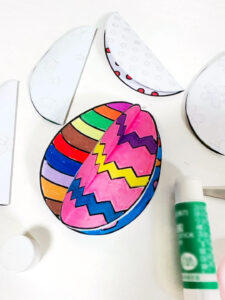
Next, fold each egg shape in half along the center, creating a distinct crease that will form the basis of your 3D eggs. Then, apply adhesive to one half of each egg shape and carefully attach them together, ensuring that the decorated sides are facing outwards. This will create a circular shape resembling half of a 3D egg.
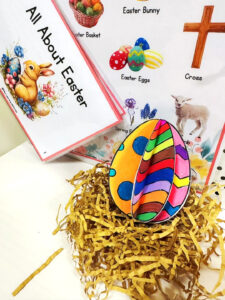
Once all the egg shapes are joined together, gently open them up to reveal their three-dimensional form. Adjust the folds as needed to create rounded, egg-like shapes that are ready to be displayed or hung as festive decorations.
Whether you’re crafting with kids, looking for a creative way to decorate for Easter, or simply enjoy the satisfaction of making something with your own hands, our DIY Easter 3D Egg template is sure to inspire and delight. Happy crafting!
If you’re ready to unleash your creativity and make your own DIY Easter 3D eggs, simply click the link below to access our detailed tutorial and get started on this fun and rewarding craft project:
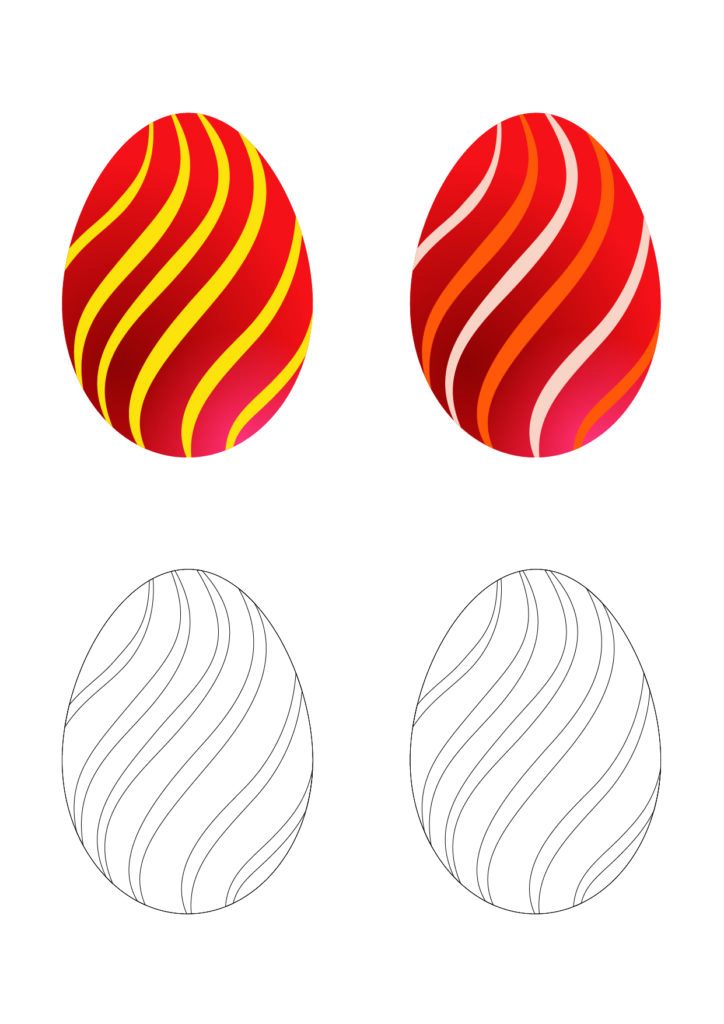
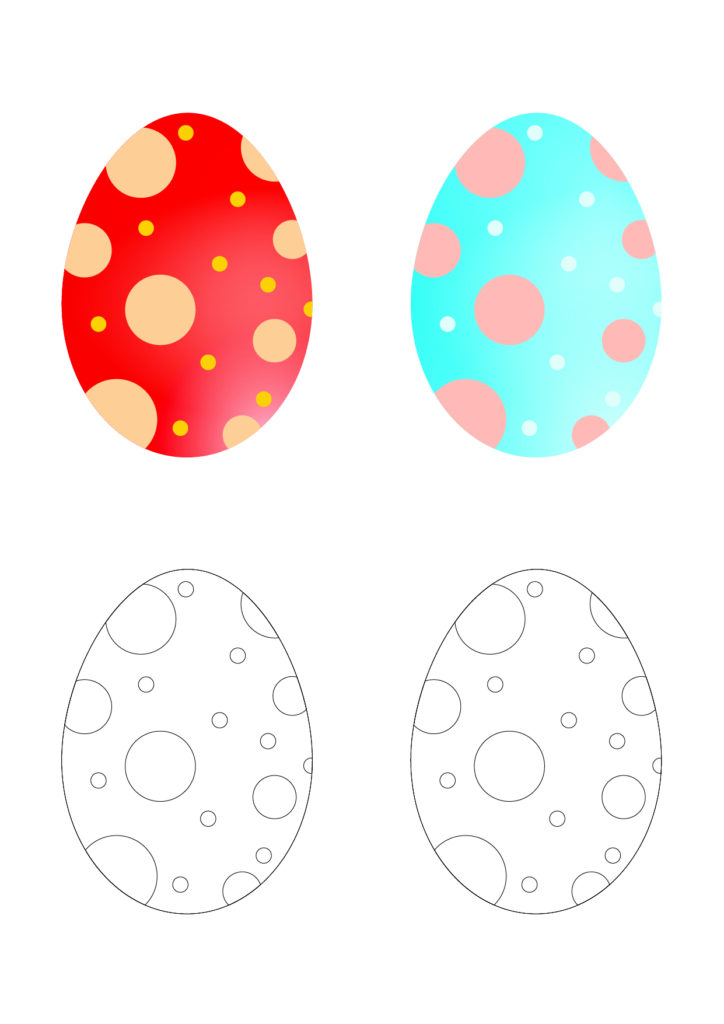
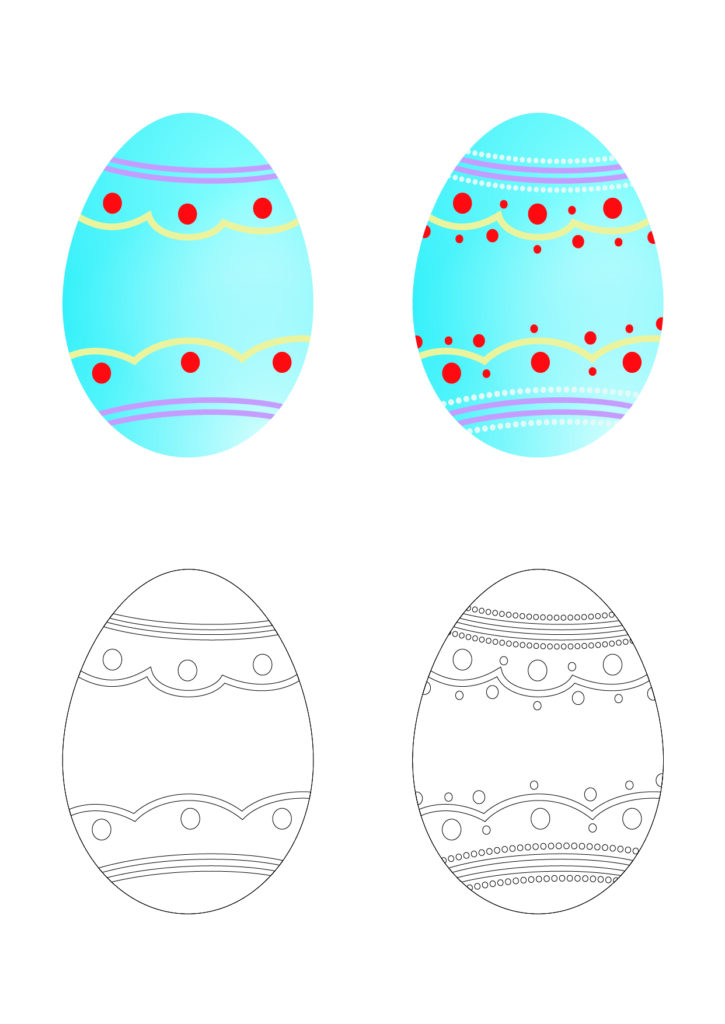
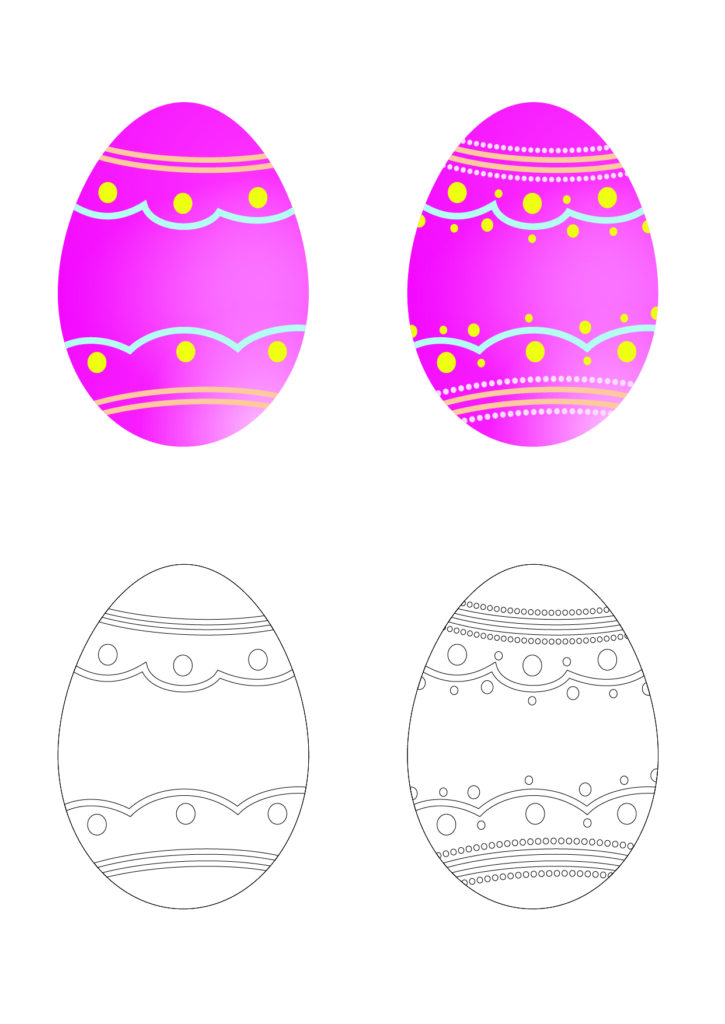
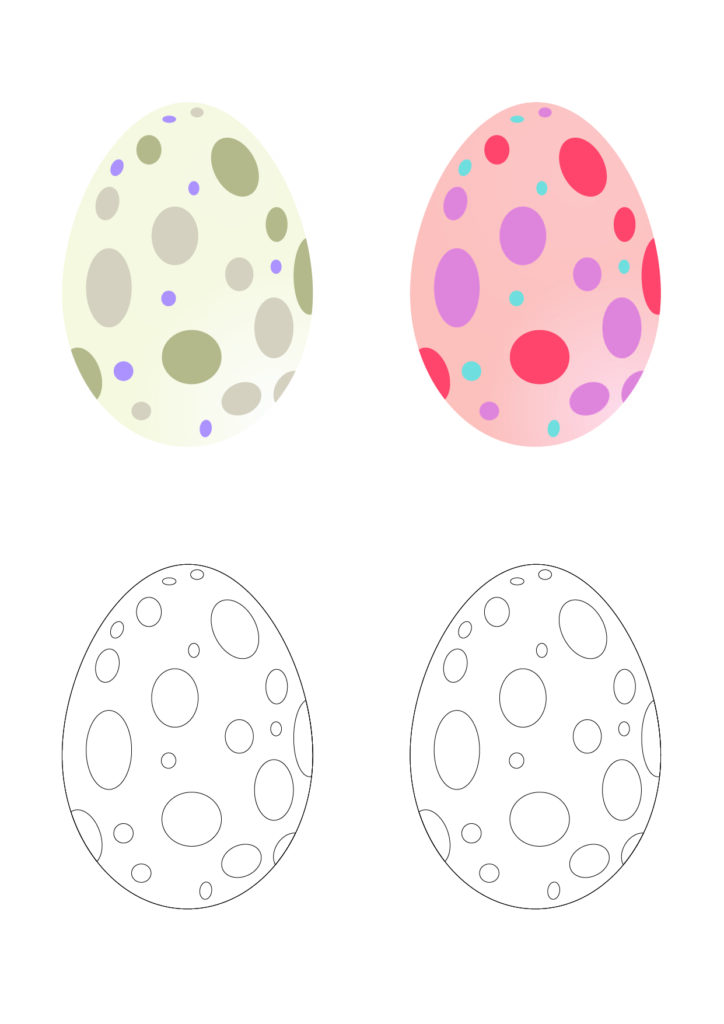
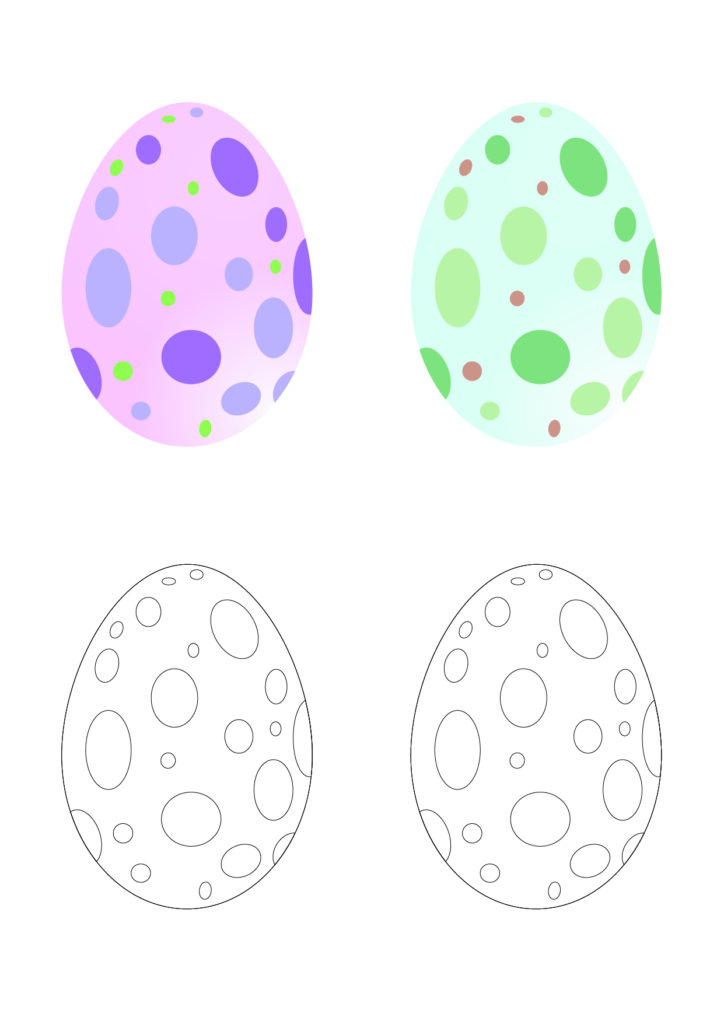
The copyright of the pictures in this coloring pages belongs to igoodieas.com. Without permission, no one can copy them to any other website or use them for commercial purposes.
Looking for a fun and creative way to decorate for Easter? Why not try making your own DIY Easter 3D Egg? With just a few simple materials and easy-to-follow steps, you can craft charming Easter decorations that will delight friends and family alike.
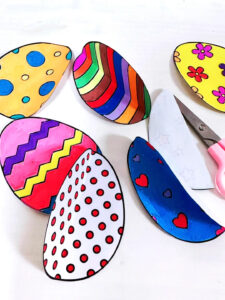
2. Carefully cut out eight egg shapes using scissors. Take your time to ensure smooth edges and even shapes.
3. Fold each egg shape in half, creasing along the center to create a distinct fold.
4. Apply adhesive to one half of each egg shape, then carefully attach them together, ensuring that the decorated sides are facing outwards. This will form a circular shape, resembling half of a 3D egg.
5.Gently open up each egg shape, allowing them to unfold and form a three-dimensional egg. Adjust the folds as needed to create a rounded, egg-like shape.
And there you have it – your very own homemade 3D Easter eggs! These charming decorations can be displayed in a variety of ways, from hanging them on branches or string to scattering them across your Easter table as festive accents. Get creative with different colors, patterns, and sizes to make a unique collection of Easter eggs that will brighten up any space.
Whether you’re crafting with kids as a fun holiday activity or simply looking to add a personal touch to your Easter decor, making 3D Easter eggs is a delightful and rewarding DIY project. So gather your materials, unleash your creativity, and enjoy making these adorable Easter decorations that are sure to bring joy and cheer to your home during the holiday season. Happy crafting!
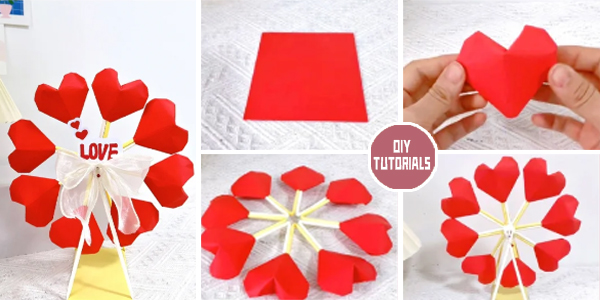
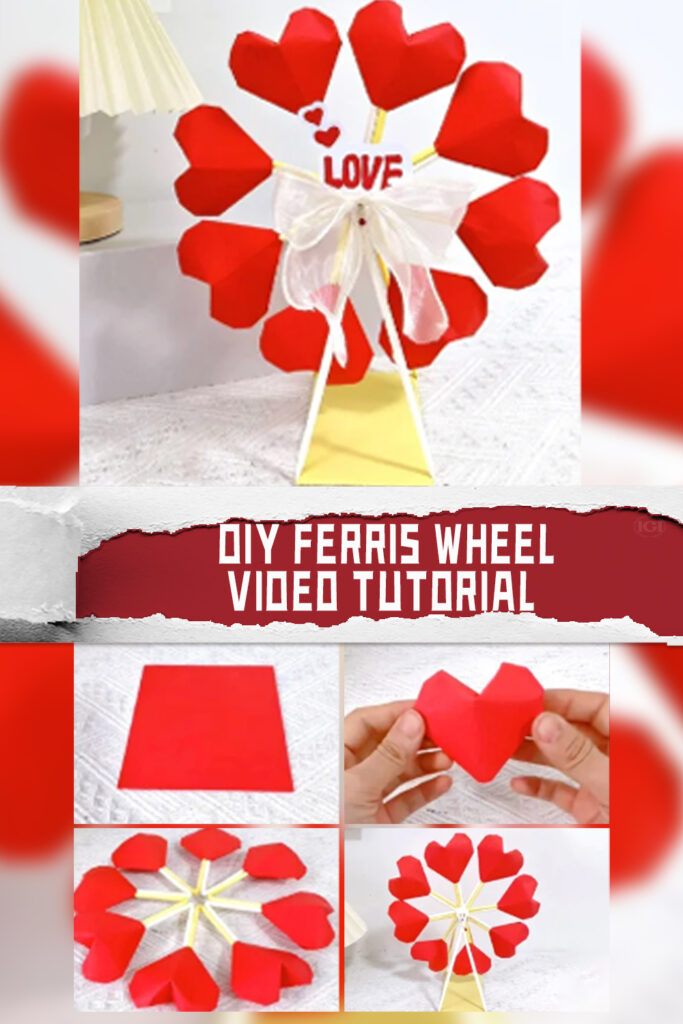
Looking to add a touch of whimsy and romance to your décor? Why not try your hand at crafting a charming DIY Heart Ferris Wheel! This delightful project combines the elegance of origami with the fun of construction, resulting in a whimsical centerpiece that’s sure to steal hearts. Follow along with our step-by-step video tutorial to bring this enchanting creation to life.
1. To begin, gather your materials: 15x15cm origami paper for folding eight 3D hearts. Follow the detailed instructions in the video to create these intricate heart shapes, each a symbol of love and affection.
2. Next, take another piece of 15x15cm white paper and fold it into eight slender sticks. Secure the folds with tape or glue, forming the framework for your Ferris wheel.
3. Carefully insert each heart onto a stick, securing them in place with glue or tape. Watch as your Ferris wheel begins to take shape, the hearts spinning gently in the breeze.
4. Now, fashion a base for your Ferris wheel by cutting a piece of cardboard and wrapping it with origami paper. Use four of the sticks as supports, attaching them securely to the base.
5. Create a central axis for your Ferris wheel by rolling a piece of paper into a sturdy tube and inserting it into the designated hole. Secure it in place with glue, ensuring it remains upright.
6. Using the remaining stick, thread it through the holes in the supports, anchoring the Ferris wheel securely in place.
7. Finally, let your creativity soar as you embellish your DIY Heart Ferris Wheel with additional decorations. Add glitter, sequins, or ribbons to personalize your creation and make it truly one-of-a-kind.
With your DIY Heart Ferris Wheel complete, display it proudly as a whimsical centerpiece at weddings, parties, or romantic evenings at home. Let its gentle spin and heartfelt design serve as a reminder of the joy and love that surrounds us.
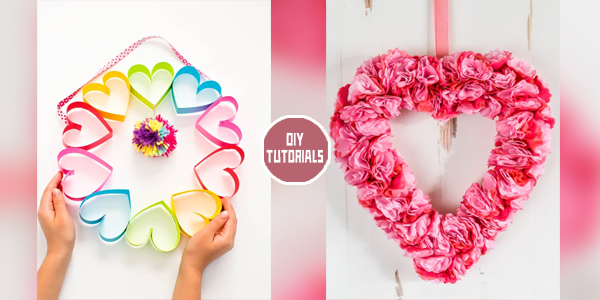
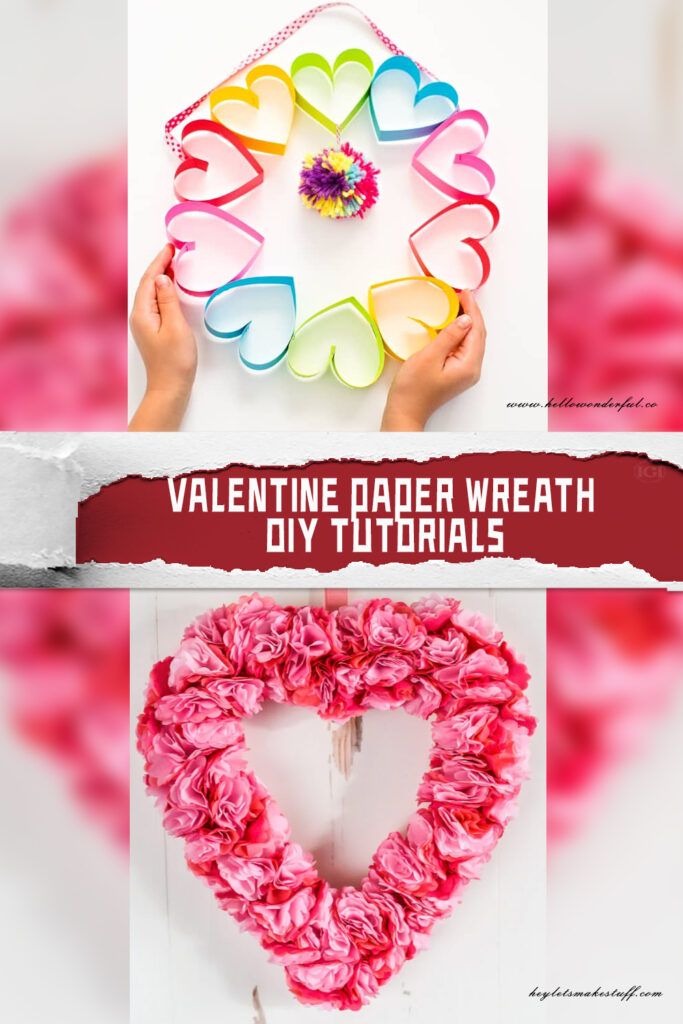
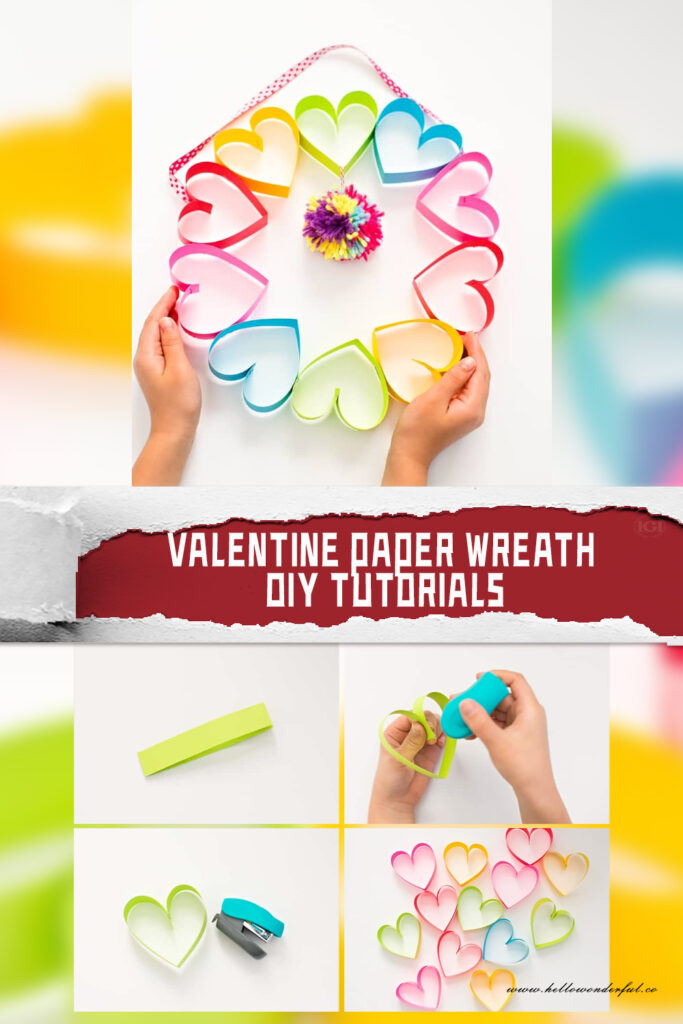
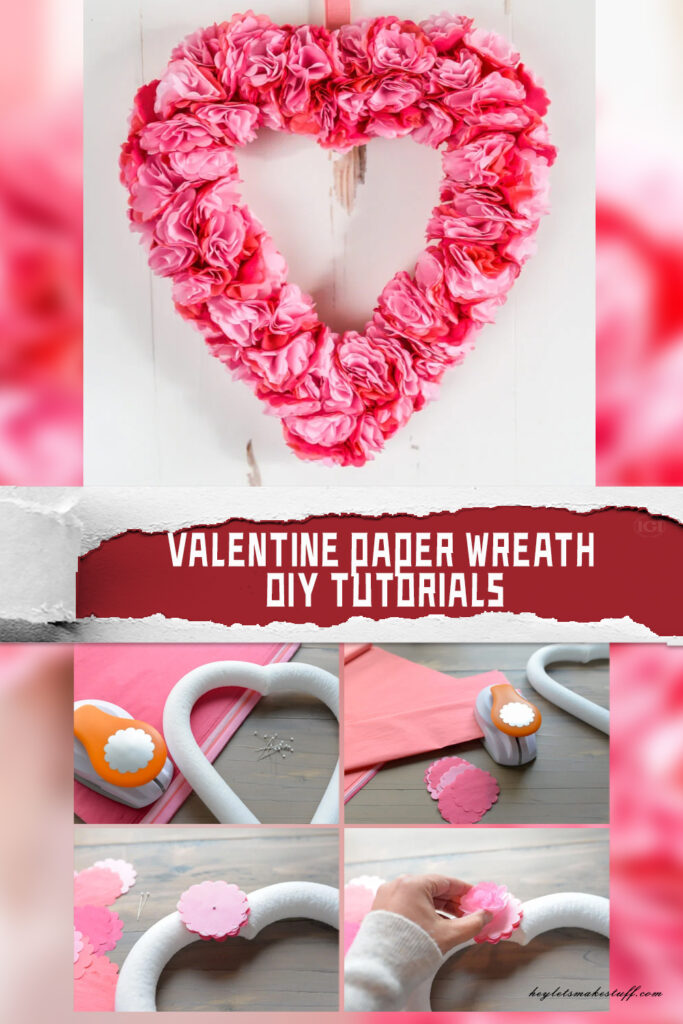
Valentine’s Day is a celebration of love and affection, a time when people express their feelings through heartfelt gestures and gifts. One charming way to add a touch of warmth and creativity to this occasion is by crafting a Valentine paper wreath. In this essay, we’ll explore the joy of DIY crafting through two delightful tutorials that guide us in making beautiful paper wreaths, perfect for adorning any space with love. Whether it’s choosing specific colors to match a loved one’s preferences or adding personalized touches like messages or photographs, these wreaths can be tailored to reflect the unique bond shared between individuals. Moreover, the act of crafting itself becomes a gesture of love, as each fold and snip is imbued with thoughtfulness and care.We extend our heartfelt gratitude to all the talented designers who generously shared these DIY Valentine Paper Wreath Tutorials, allowing crafters to bring their creative visions to life. To access these delightful patterns, simply scroll down the page and click on the links provided below the pictures. Happy crafting!
1. The first tutorial, provided by Hello Wonderful, introduces us to the whimsical world of rainbow paper heart pom-pom wreaths. Using a variety of colorful paper, scissors, and glue, this tutorial teaches us how to cut out heart shapes and assemble them into fluffy pom-poms. The result is a vibrant wreath bursting with love and cheer, reminiscent of a rainbow arching across the sky. With each heart representing a piece of affection, this wreath becomes not just a decoration but a symbol of the boundless love that surrounds us.
2. In the second tutorial by Hey, Let’s Make Stuff, we delve into the art of creating a tissue paper wreath. With a focus on simplicity and elegance, this tutorial utilizes tissue paper in soft pastel hues to fashion delicate flowers. By folding, cutting, and shaping the tissue paper, we transform humble materials into blossoms that radiate grace and beauty. Assembling these flowers onto a wreath base, we craft a timeless piece that captures the tender essence of love.
In conclusion, crafting a Valentine paper wreath is a delightful way to celebrate love and creativity. Through these DIY Valentine Paper Wreath tutorials, we discover the joy of transforming simple materials into cherished symbols of affection. Whether it’s the vibrant charm of rainbow pom-poms or the delicate beauty of tissue paper flowers, these wreaths serve as heartfelt expressions of love that brighten any space and warm the hearts of those who receive them.
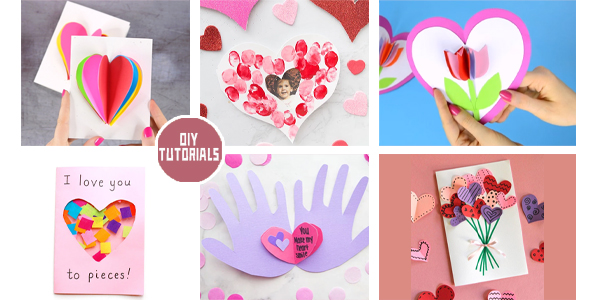
Valentine’s Day is a celebration of love, and what better way to express your affection than through heartfelt handmade crafts? Crafting provides a personal touch that speaks volumes, and with these six delightful DIY tutorials, you can create memorable tokens of love for your significant other, friends, or family. From 3D heart cards to handprint valentines, each project offers a unique way to spread love and joy on this special day. We extend our heartfelt gratitude to all the talented designers who generously shared these free DIY Valentine’s Heart Craft tutorials, allowing crafters to bring their creative visions to life. To access these delightful patterns, simply scroll down the page and click on the links provided below the pictures. Happy crafting!
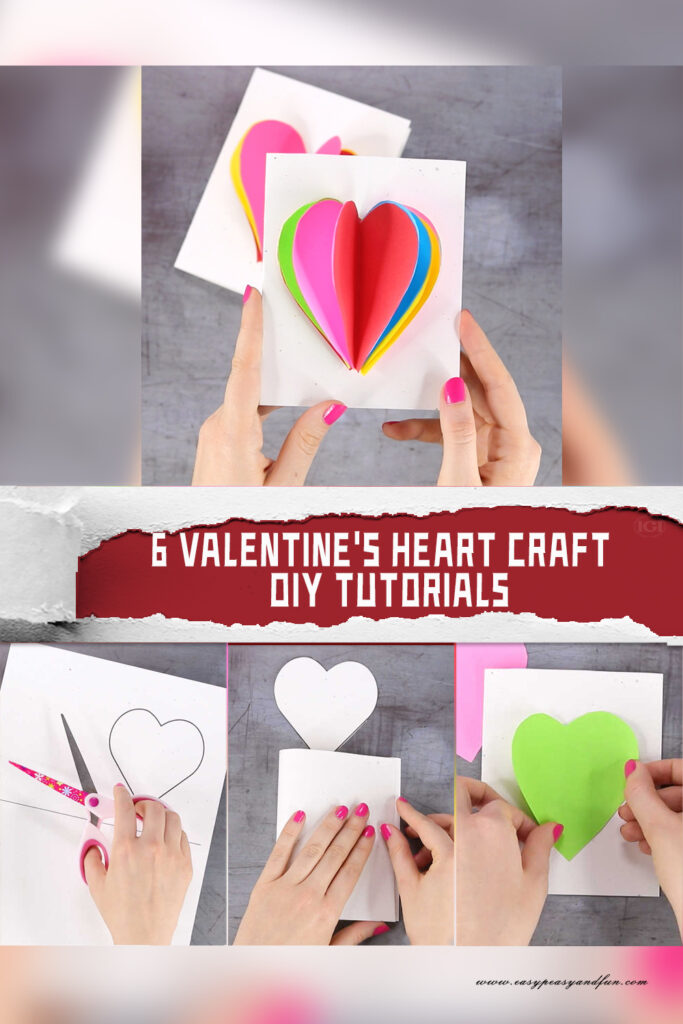
1. 3D Heart Card:
The 3D heart card tutorial from easypeasyandfun.com is a charming way to convey your love. With simple materials like paper, scissors, and glue, you can create a pop-up card that will surely impress your loved one. The step-by-step instructions make it easy to follow, and the end result is a delightful surprise that will warm the heart of anyone who receives it.
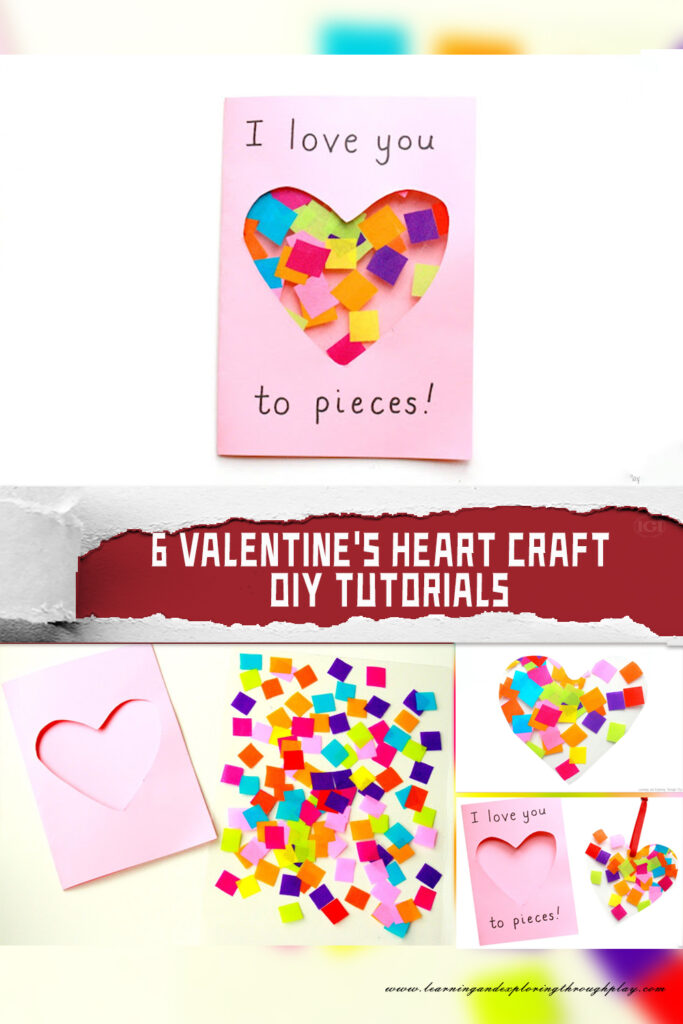
2. Love You to Pieces Suncatcher Card:
This creative project from learningandexploringthroughplay.com combines the beauty of a suncatcher with a heartfelt message. By using colorful tissue paper and clear contact paper, you can create a stunning card adorned with heart-shaped “pieces” that symbolize your love. Hang it in a sunny window to catch the light and spread love throughout the room.
3. Fingerprint Heart Card:
The fingerprint heart card tutorial from thebestideasforkids.com adds a personal touch to your Valentine’s Day greetings. With just ink or paint and your fingertips, you can create adorable heart designs that showcase your unique bond. This project is perfect for kids and adults alike, and each fingerprint becomes a precious reminder of the love shared between you and your recipient.
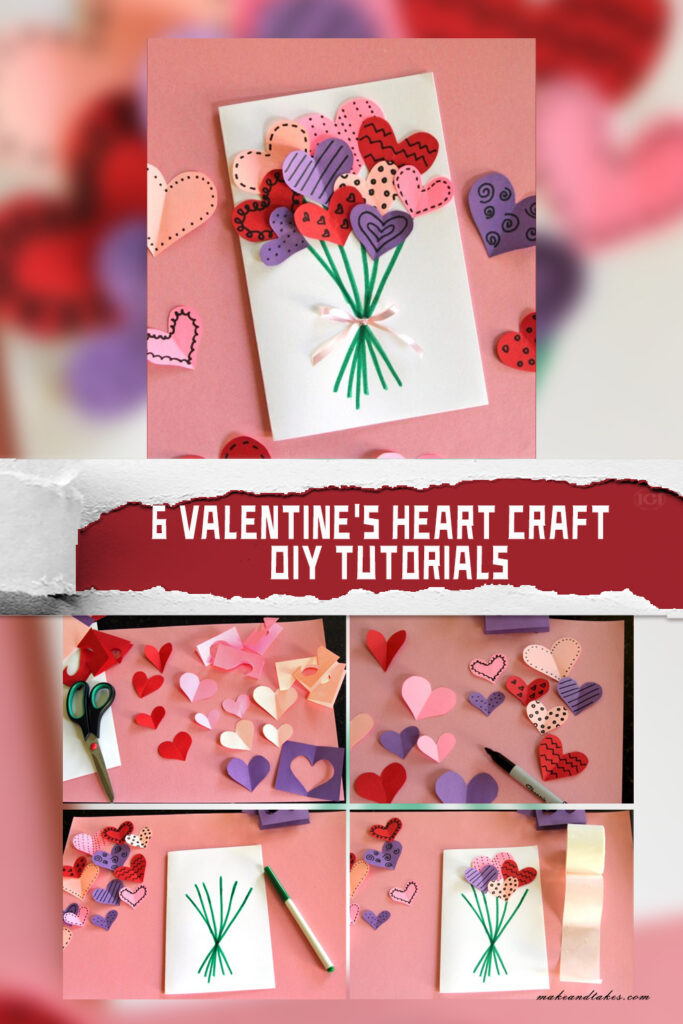
4. Bouquet Hearts Card:
Makeandtakes.com offers a bouquet hearts card tutorial that puts a creative spin on traditional Valentine’s Day flowers. Using colorful paper hearts and a few simple folds, you can craft a charming card that resembles a bouquet of flowers. Add a heartfelt message to complete the gesture, and watch as your loved one’s face lights up with joy.
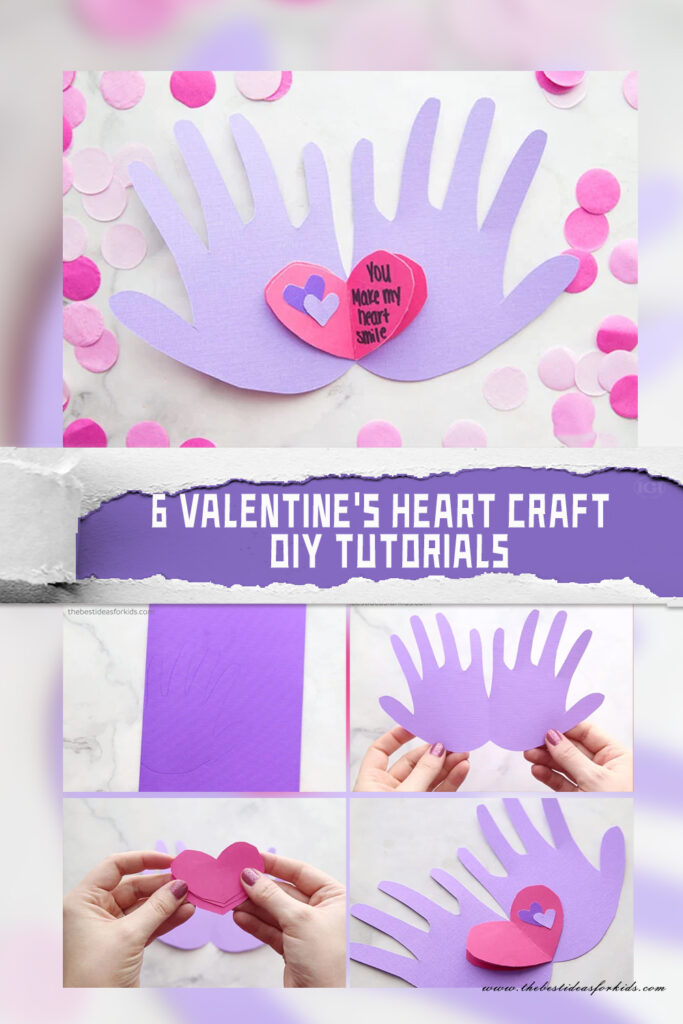
5. Handprint Valentine:
Celebrate the love of family with the handprint valentine tutorial from thebestideasforkids.com. This project captures the unique size and shape of each person’s hand, making it a meaningful keepsake for years to come. Whether you’re crafting with children or adults, the process of tracing and cutting out handprints is sure to create cherished memories.
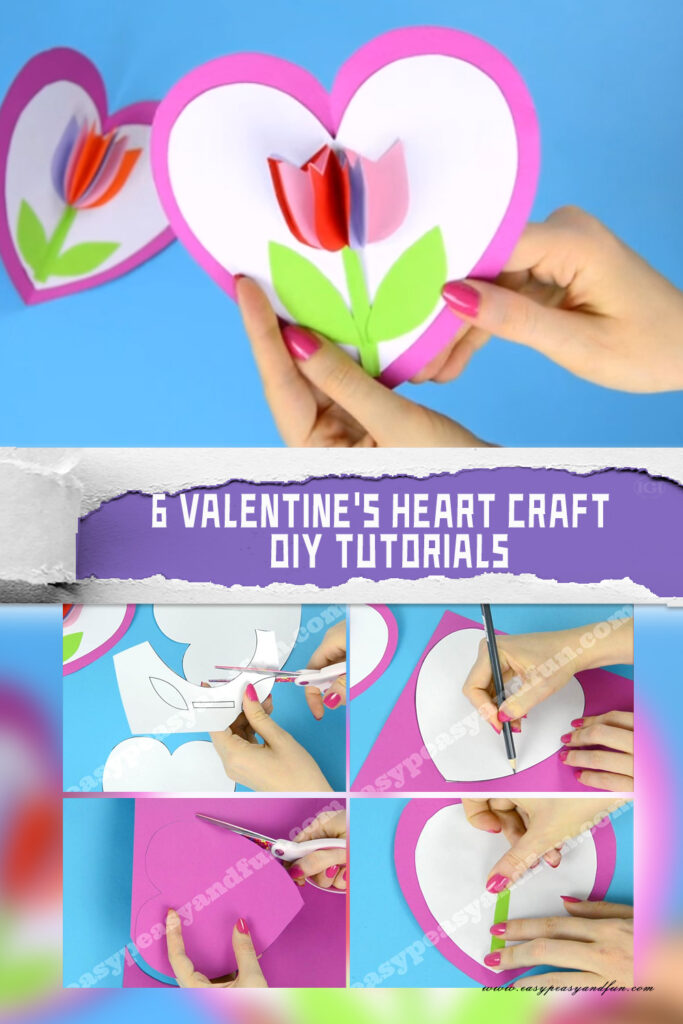
6. Tulip in a Heart Card:
The tulip in a heart card tutorial from easypeasyandfun.com combines two classic symbols of love into one delightful design. With just paper, scissors, and glue, you can create a beautiful card that features a tulip nestled within a heart-shaped frame. This project is perfect for expressing your affection to someone special and will surely brighten their day.
This Valentine’s Day, unleash your creativity and spread love with these six heartwarming DIY Valentine’s Heart projects. Whether you’re crafting cards for your partner, children, or friends, each tutorial offers a unique way to express your affection and appreciation. From simple fingerprint designs to intricate pop-up cards, there’s a project for every skill level and preference. So gather your materials, set aside some time for crafting, and let love guide your hands as you create meaningful gifts that will be treasured for years to come.
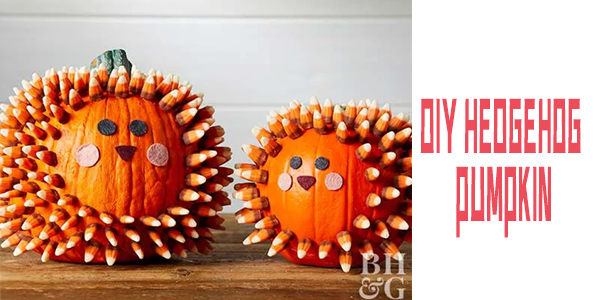
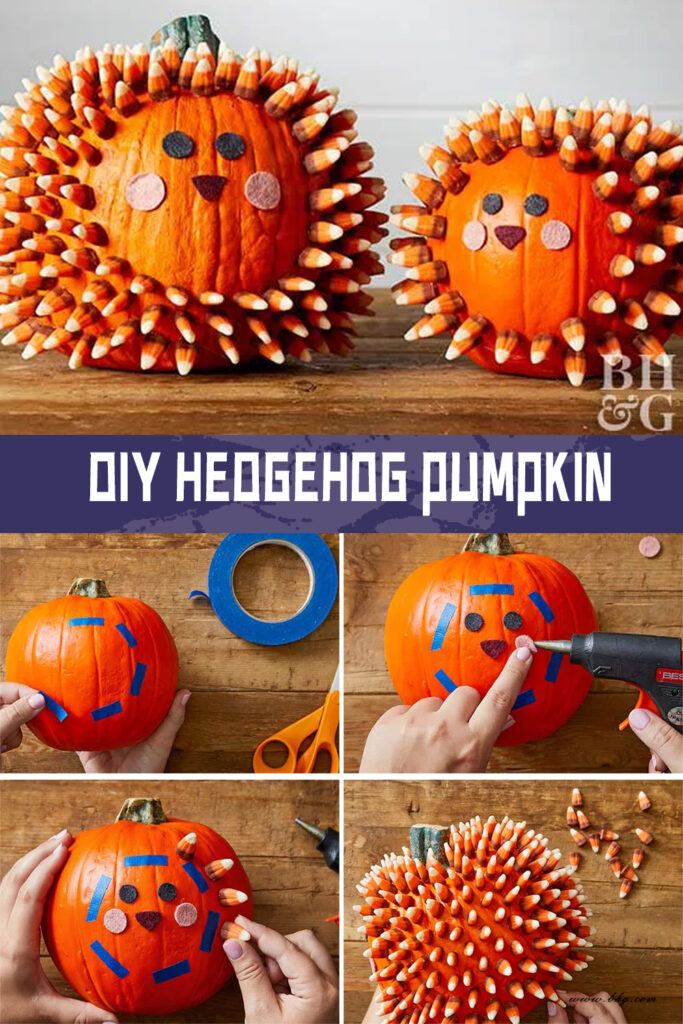
Halloween is just around the corner, and what better way to celebrate than by creating your very own Hedgehog Pumpkin? This delightful DIY Hedgehog Pumpkin adds a touch of whimsy to your Halloween decor. Inspired by nature, this adorable hedgehog-themed pumpkin is easy to make and promises to bring a smile to everyone’s face.
Materials and Preparation :
To get started on your Hedgehog Pumpkin, gather the following materials: a medium-sized pumpkin, brown and black acrylic paint, a paintbrush, craft foam sheets in various colors, googly eyes, scissors, and a hot glue gun. Once you have everything ready, lay down some newspaper or an old cloth to protect your workspace, and you’re all set for this creative adventure.
Hedgehog Pumpkin Step-by-Step Instructions :
1.Begin by painting your pumpkin entirely brown. This will be the hedgehog’s body. Allow it to dry completely before moving on to the next step.
2.While your pumpkin dries, cut out the hedgehog’s facial features from the craft foam sheets. You’ll need two small black circles for the eyes, a tiny black triangle for the nose, and two brown ears.
3.Once the pumpkin is dry, attach the googly eyes and nose using your hot glue gun. These will give your hedgehog its endearing expression.
4.For the ears, fold the brown foam pieces in half to create a 3D effect. Glue them to the top of the pumpkin.
5. Now, create the hedgehog’s quills by cutting small strips from a black craft foam sheet. Glue these strips all over the pumpkin, focusing on the top and sides to give it that unmistakable hedgehog appearance.
6. Allow your creation to dry completely, and you’ll have your very own Hedgehog Pumpkin ready to charm your Halloween guests!
This delightful DIY Hedgehog Pumpkin project is not only easy but also a wonderful way to add a touch of whimsy to your Halloween decor. Whether displayed indoors or outdoors, your Hedgehog Pumpkin will be a hit with trick-or-treaters and guests alike. Get crafting and enjoy the festive spirit this Halloween!
Thanks to bhg.com for sharing this wonderful DIY Hedgehog Pumpkin craft. Get the full tutorial HERE.
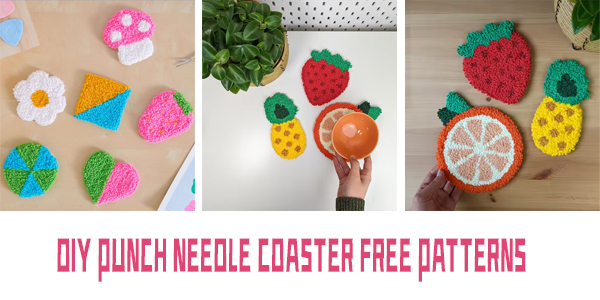
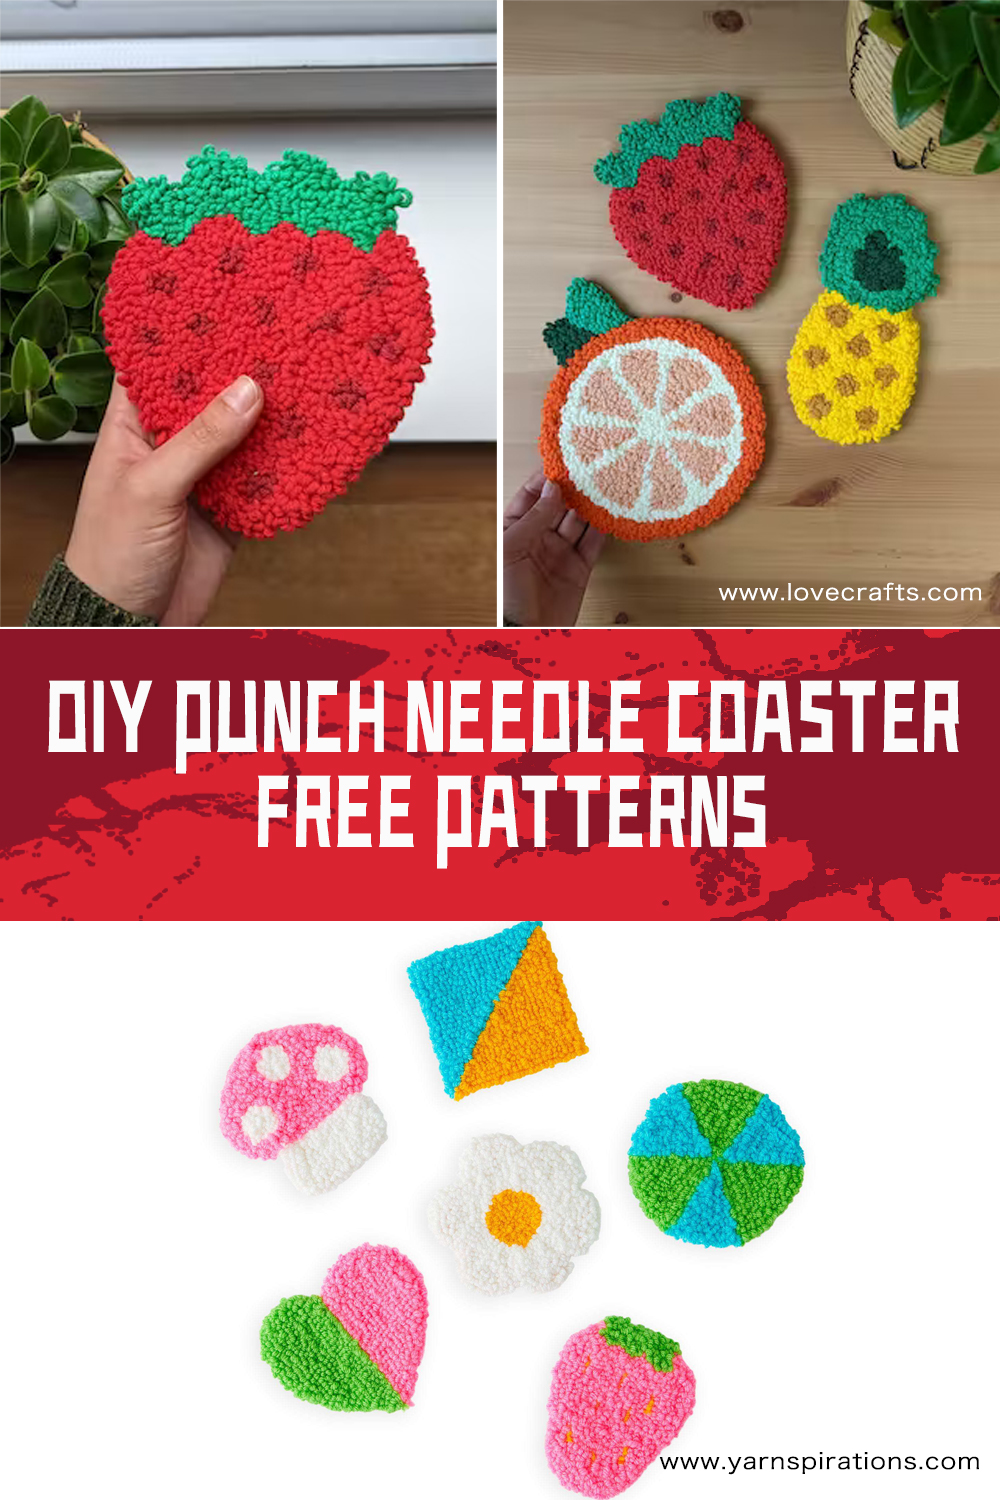
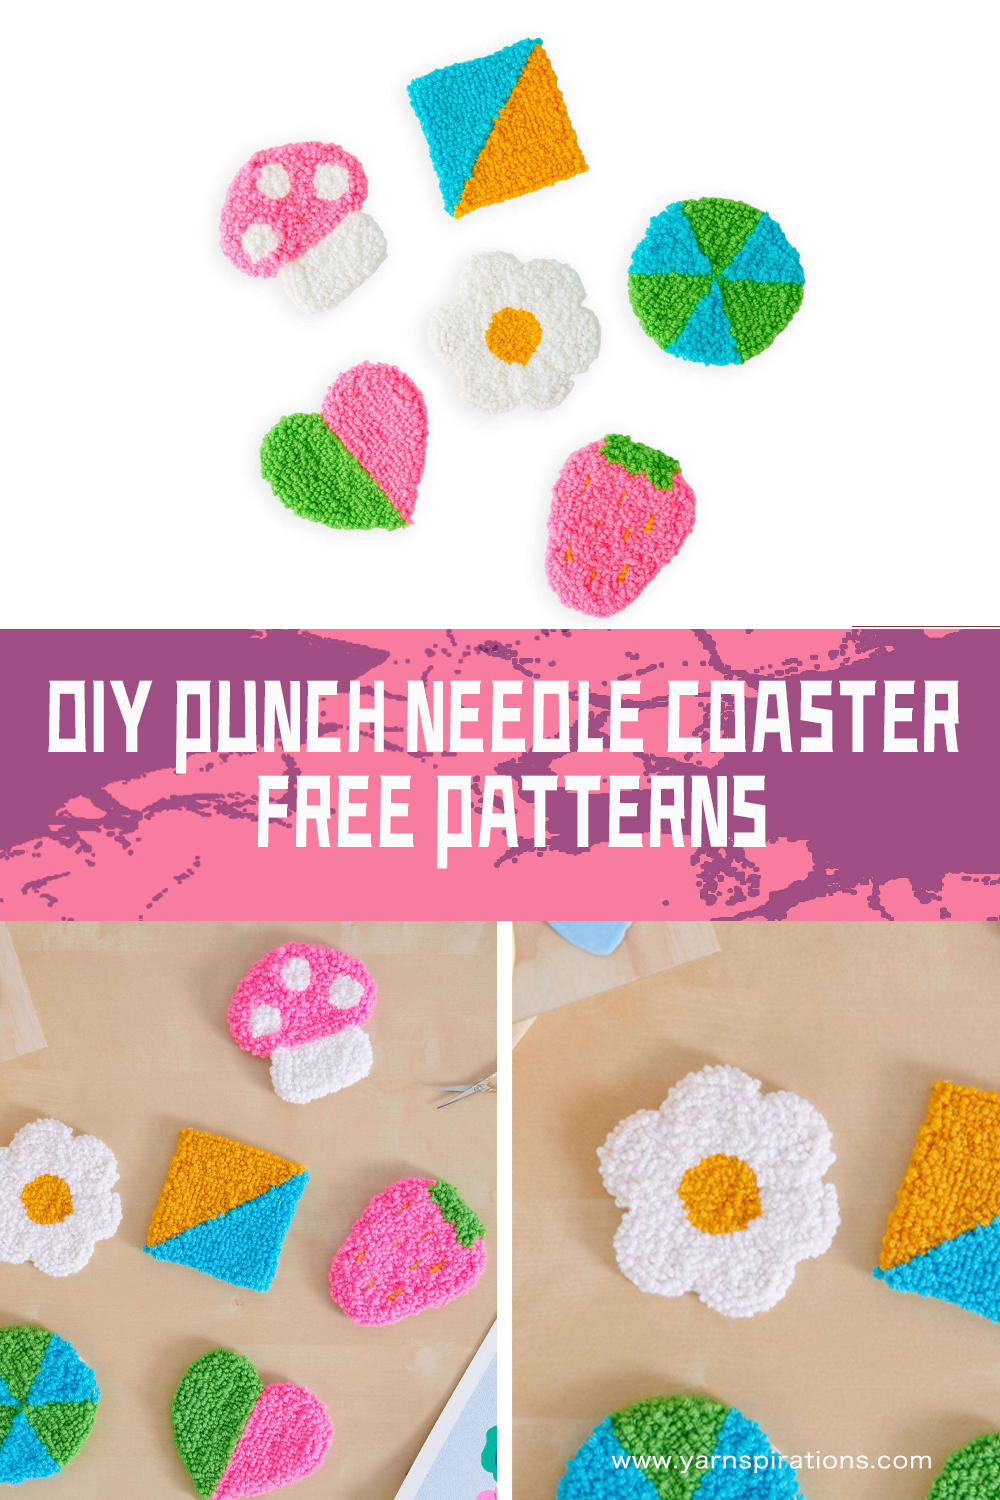
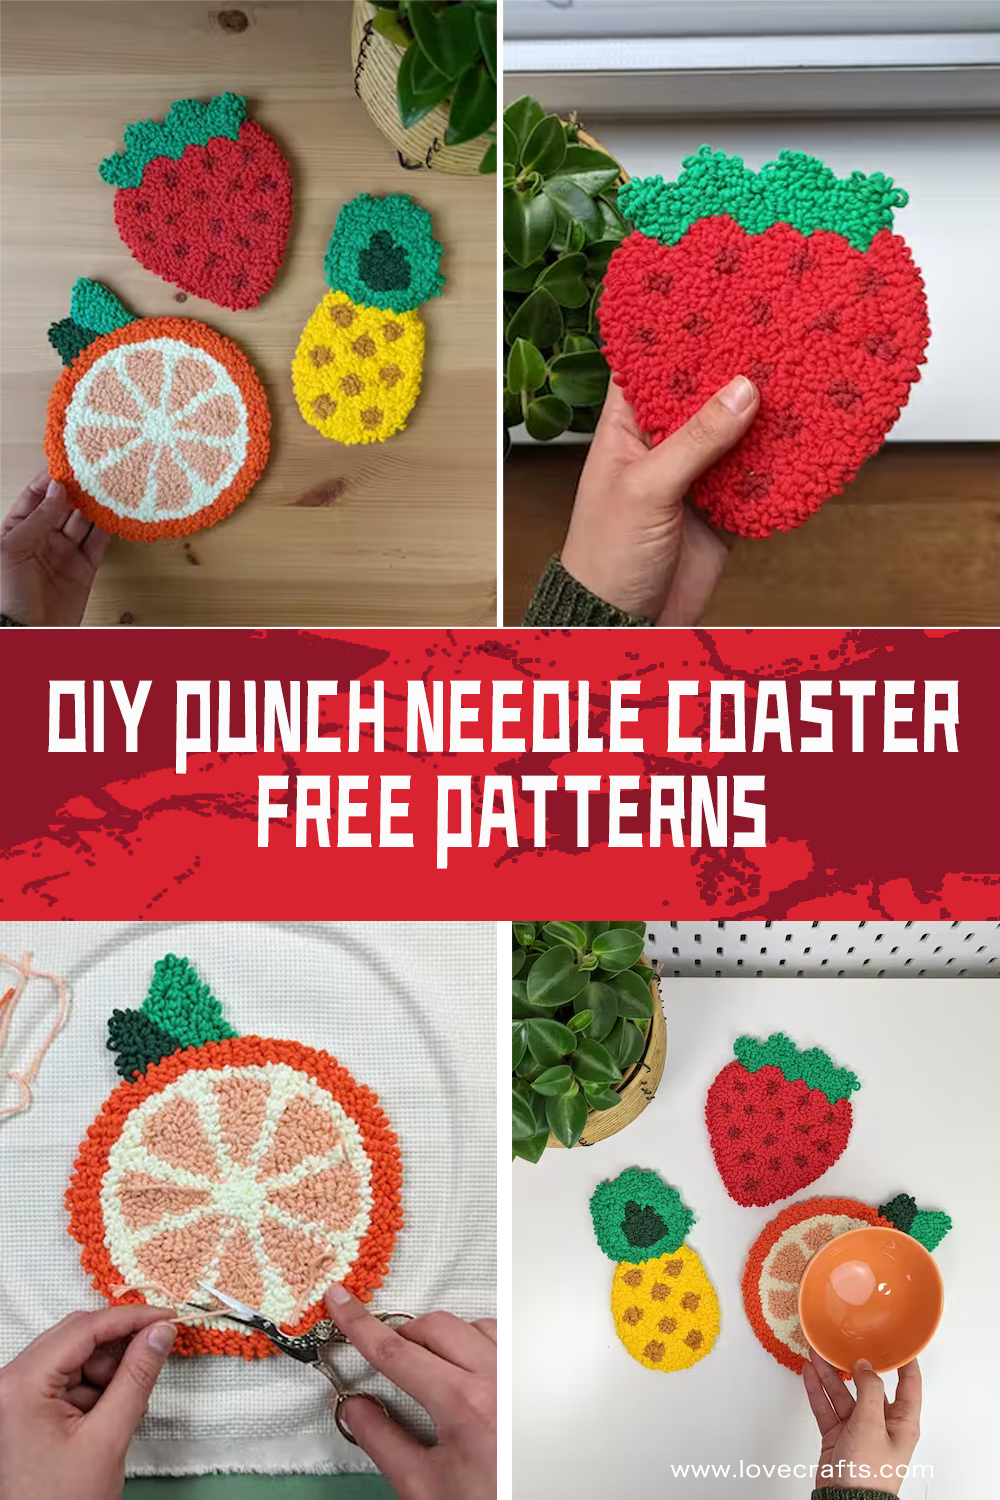
DIY Punch Needle Coaster is a great way to get started with punch needle embroidery. It is simple, fun, and easy to make, and can add a touch of color and personality to your home. Whether you choose to follow a pattern or create your own, punch needle coasters are sure to be a hit with anyone who sees them. Today we will explore two of the best free patterns available for making punch needle coasters. Both of these patterns are great for beginners, as they are easy to follow and can be completed in just a few hours. They also require only a few materials, making them a great budget-friendly project. To get started, you will need a punch needle, fabric, yarn, and a hoop. Punch needles come in a variety of sizes, so be sure to choose one that is appropriate for your project. Fabric should be tightly woven to prevent fraying, and hoops help to keep the fabric taut while you work.
Thanks to the all designers for sharing these FREE Patterns ! To get these patterns and tutorials , please scroll down the page and click the links below the pictures.Let’s give punch needle embroidery a try and create our own set of beautiful and unique coasters today! Enjoy!
The first pattern we will look at is from Yarnspirations. Their Red Heart Punch Needle Coaster pattern is a great place to start for beginners. This pattern features a simple, yet elegant design with concentric circles in alternating shades of blue. The pattern is easy to follow and can be completed in just a few hours, making it the perfect project for a lazy afternoon. The yarn used in this pattern is Red Heart Super Saver, a durable and affordable yarn that comes in a wide range of colors.
The second pattern we will look at is from LoveCrafts. Their Punch Needle Coasters pattern features four different designs that are perfect for adding a touch of color and personality to your home. The first design is a colorful rainbow, perfect for brightening up any space. The second design is a classic stripe pattern, featuring alternating shades of blue and white. The third design is a fun and whimsical cactus, perfect for adding a touch of the desert to your home. The final design is a simple geometric pattern, perfect for adding a touch of sophistication to any space. The yarn used in this pattern is LoveCrafts°Ø own Paintbox Yarns, a soft and vibrant yarn that comes in a wide range of colors.
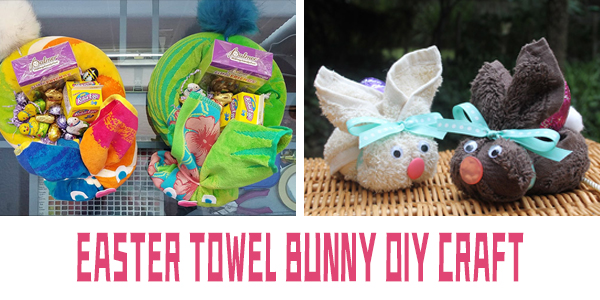
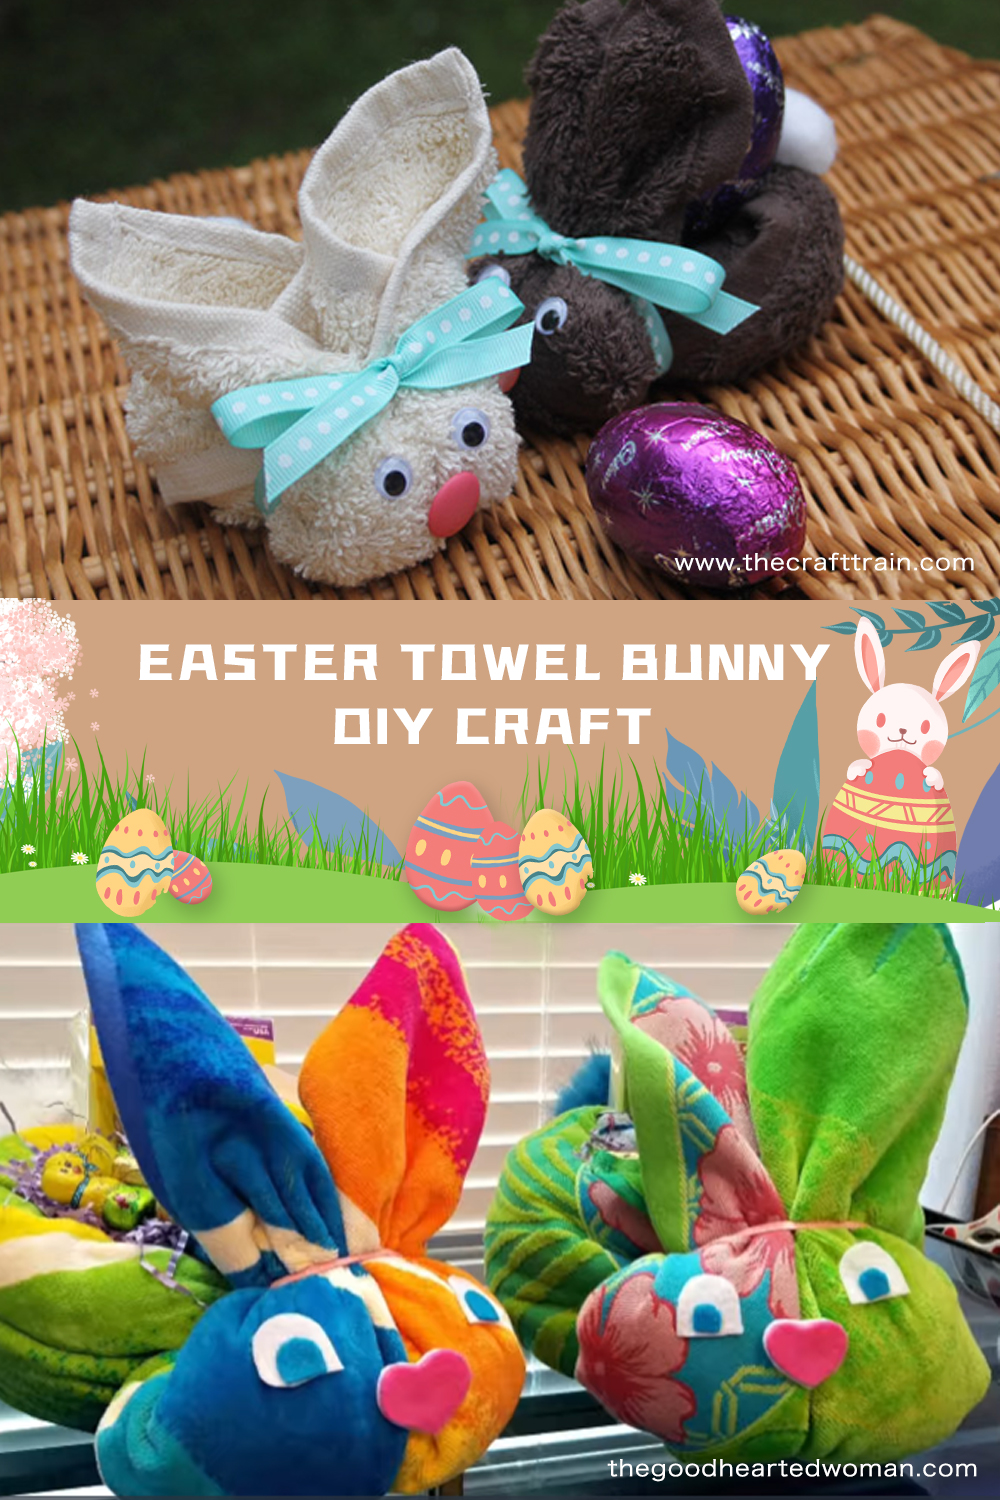
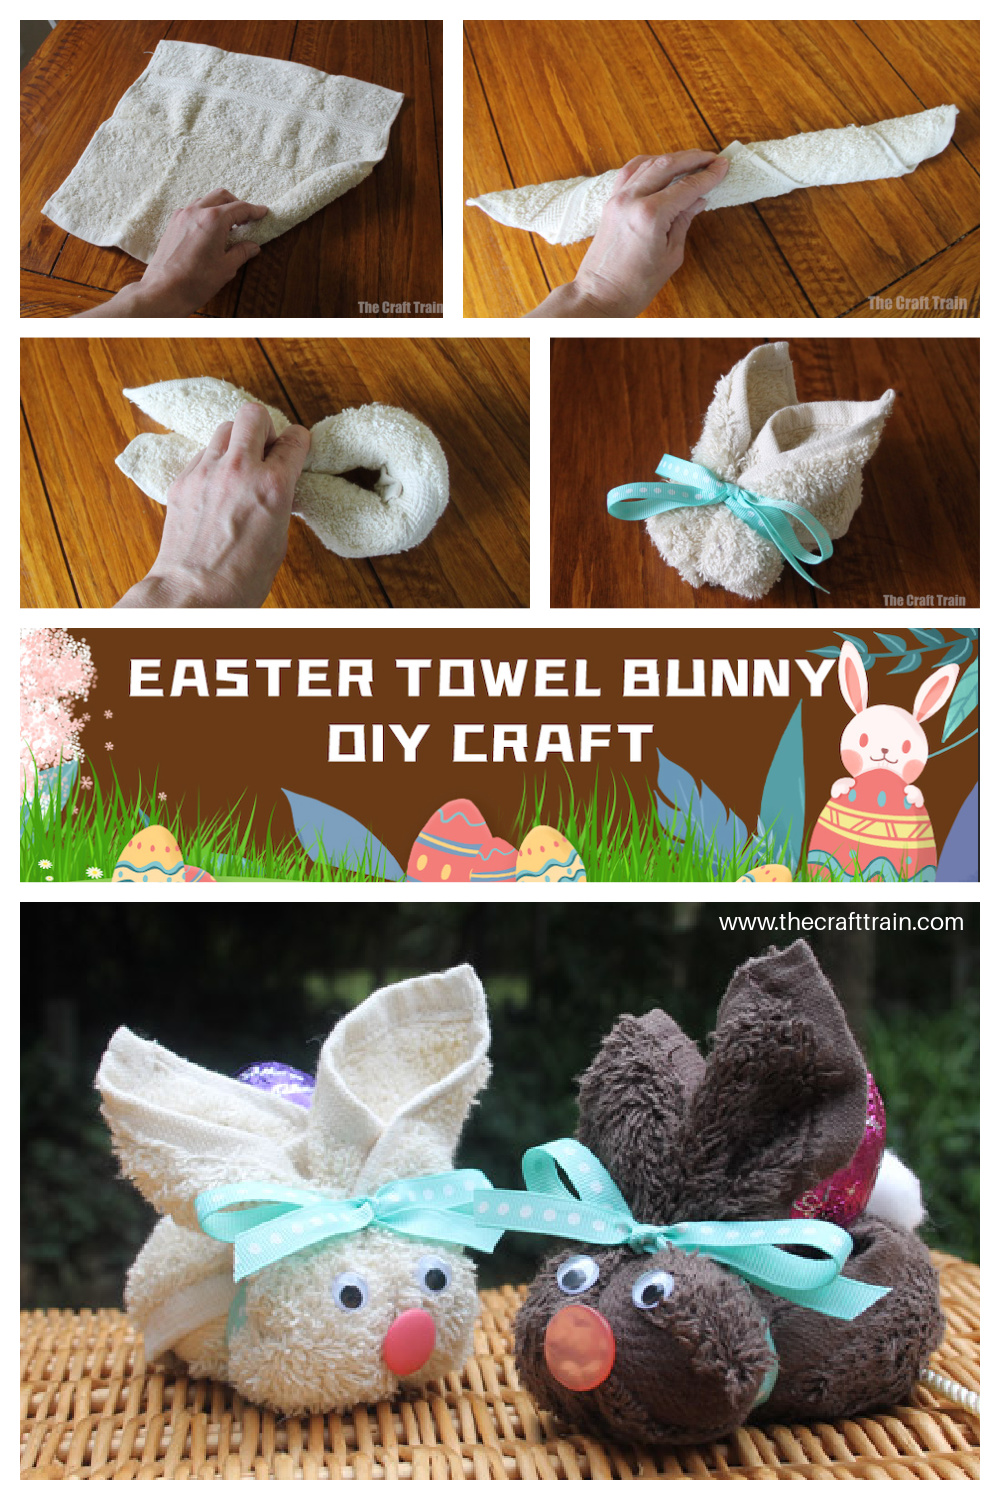
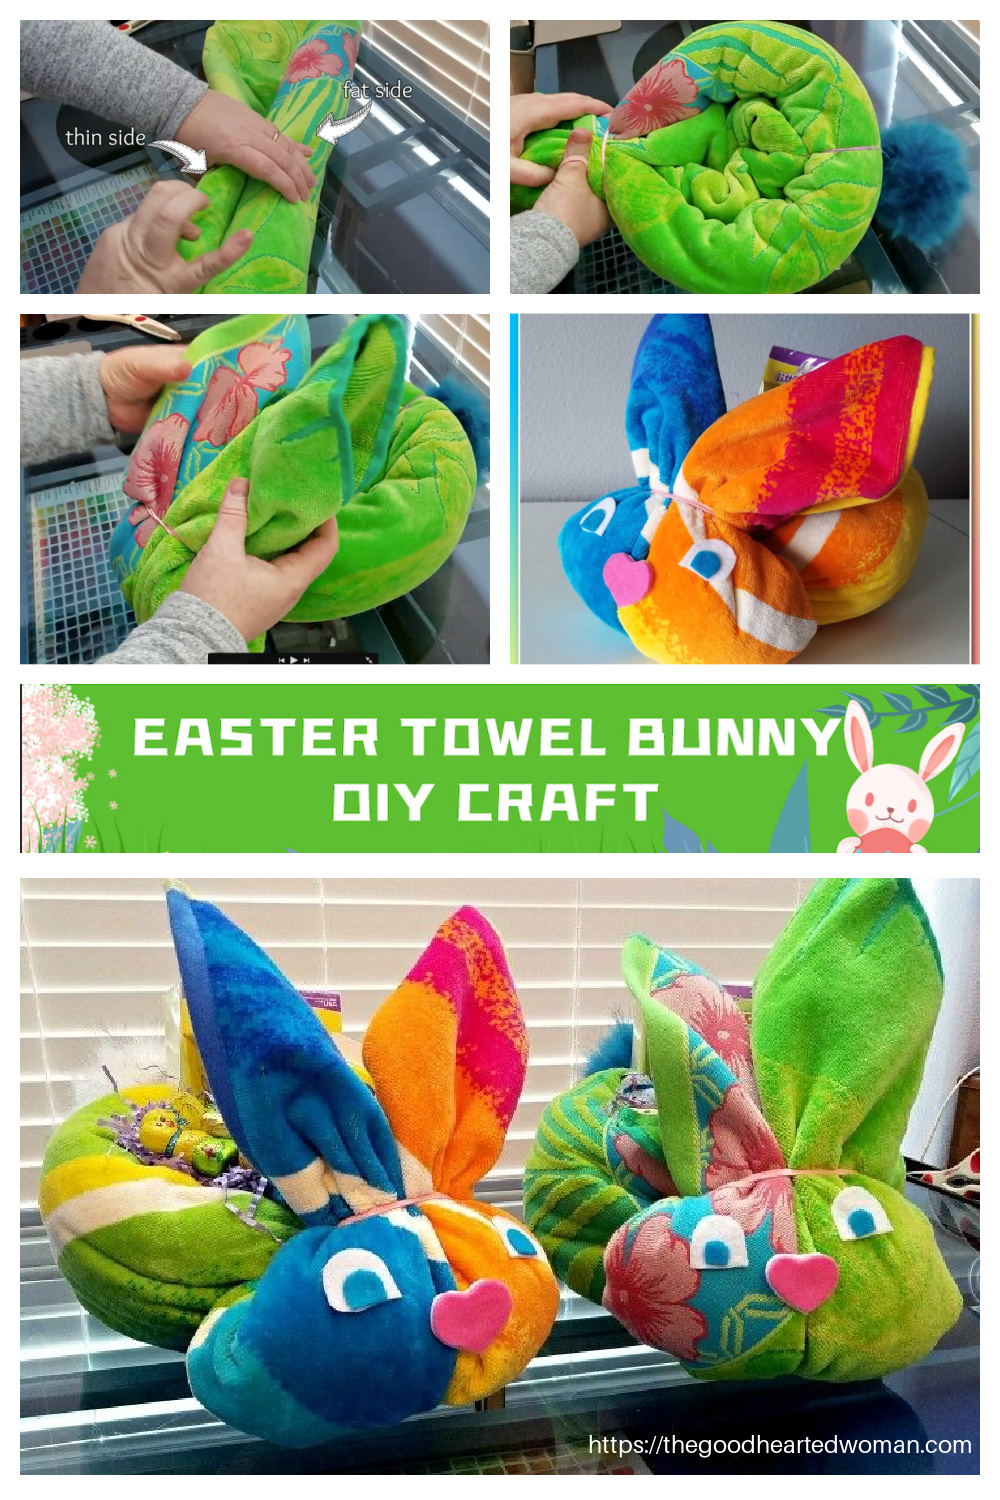
Easter is a wonderful time to get creative and try out new craft ideas. If you’re looking for a fun and easy Easter-themed craft project, then look no further than the DIY Easter Towel Bunny craft. This cute and cuddly bunny is made using just a few simple materials and can be completed in just a few hours.
1.One popular tutorial for making an Easter towel bunny is provided by The Craft Train. This adorable craft is perfect for decorating your home or for giving as a gift to someone special during the Easter holiday. The tutorial is easy to follow and requires only a few materials, including a washcloth, rubber bands, and googly eyes. The end result is a cute and fluffy bunny that will bring a smile to anyone’s face. The Craft Train also provides a printable template for the bunny’s ears, making the process even simpler. The step-by-step instructions are accompanied by helpful photos, making it a fun and easy craft for both kids and adults to enjoy. Not only is this craft a fun way to celebrate Easter, it also provides a practical use for a washcloth. This tutorial is a great example of how a simple household item can be transformed into a creative and festive decoration. Whether you’re looking for a fun activity to do with your family or a unique way to decorate your home, the Washcloth Bunny Craft is a great option.
2.Another great tutorial for making an Easter towel bunny is provided by The Good Hearted Woman. In this tutorial, a beach towel is used to create a bunny-shaped Easter basket. The tutorial provides step-by-step instructions, complete with photos, to guide crafters through the process of folding and shaping the towel into the desired bunny shape. The end result is a cute and practical Easter basket that can be used to hold Easter eggs, candy, or other small gifts.This towel bunny Easter basket is a fun and unique way to celebrate the holiday and would make a great project to do with kids. The tutorial is easy to follow and requires only a few materials, making it a budget-friendly option for those looking to add a festive touch to their Easter celebrations. Whether used as a centerpiece for an Easter brunch or as a fun way to surprise loved ones with Easter treats, this towel bunny Easter basket is sure to bring a smile to anyone’s face.
The great thing about the Easter towel bunny DIY craft is that it’s so versatile. You can use any type of towel or washcloth to create the bunny, and you can customize it with different colors and decorations to make it your own. You can also experiment with different sizes and shapes to create different types of bunnies, from small and cute to large and cuddly.
I really love the stars, the stars represent the hope of life. I also love Christmas trees. Christmas trees have the meaning of happy reunion, evergreen friendship, and gratitude. The tutorial we introduce today combines the stars and the Christmas tree, which is DIY Christmas Star Tree! This is such a fun craft that kids love it too! Perfect!
There are many methods and materials for making a snowman, such as crocheting a snowman, knitting a snowman, sewing a snowman, and making a snowman from a cup. . . We introduced snowman making with balloons and yarn the other day. . . Today we are sharing how to make a DIY Sock Snowman with socks. This sock snowman is very small and cute. This tutorial is very simple and very suitable for children to DIY, come and learn together.
For this DIY Sock Snowman project , what you will need:
Two pairs of socks, scissors, cotton (or rice), thread, glue and buttons
1. First, we prepare a pair of white socks that we don’t wear. Cut it with scissors.
2. Put stuffing (cotton, rice, etc.) in the socks and choose the material yourself. Tighten the sock with a string.
3. Put a piece of rope into the stuffed socks and divide it into the head and body of the snowman.
4. Take a pair of unused red socks with Christmas elements and cut them open.
5. Put the cut red socks on the snowman’s body as the snowman’s clothes. It can be stuck with glue (glue gun). I
6. Use another part of the red socks on the snowman’s head. As the snowman’s hat, you can stick it with glue (glue gun) and tie the gap with a rope.
7. On the snowman’s face (white socks), make the eyes and nose (you can use small beads of different colors, small buttons, etc.). You can even paint a little blush on the snowman with makeup.
8. Sew the buttons on the snowman’s clothes as the buttons of the snowman’s clothes. So our snowman is ready. More DIY crafts HERE.
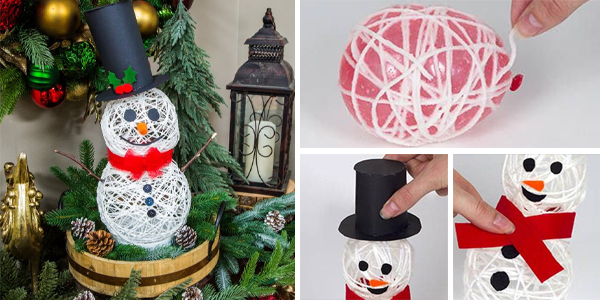
In my memory, everyone likes to build snowmen when it snows in winter. Our snowman is generally composed of two to three snowballs of different sizes. Usually, the smaller one is placed on top of the larger one to form a human shape, and a scarf, hat or coat button is attached to make it more human-like. Sometimes, buckets, brooms, carrots, etc. are used as decorations to make it more cute. However, some warm places do not snow in winter, such as most places in California, Christmas is not perfect without a snowman. Moreover, the snowman doesn’t last long, and it melts when the temperature is high, so how to make a snowman that won’t melt? The answer is that we DIY our own snowmen from materials that won’t melt. Here are two DIY Yarn Balloon Snowman tutorials, let’s go through them, and make Christmas more fun. First we need to add 2 parts PVA and 1 part water to a bowl and mix together to blow up the balloon. Put the wool in the glue mixture and wrap it around the balloon. Repeat the previous steps to make the snowman’s head and body separately. Finally glued together. Then use some decorations for the snowman’s eyes, mouth, etc. Let’s follow the tutorial and make it step by step. Both tutorials are easy to follow, and in no time you’ll be able to make really cute snowmen. Thanks to Hallmarkchannel and Bakerross for the great DIY Yarn Balloon Snowman tutorials. The details is linked below the picture, Have fun!
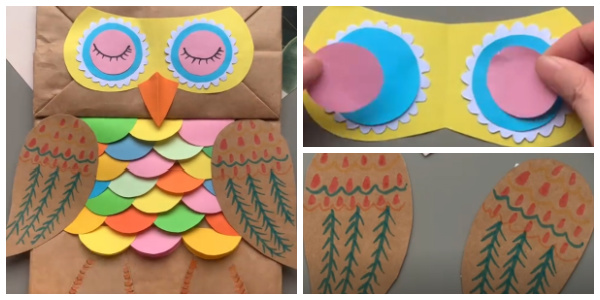
The ancient Greeks revered the owl as a symbol of Athena and wisdom. In Japan, the owl is called the bird of luck, and has also become the mascot of the Nagano Winter Olympics, representing good luck and happiness. Today we are going to learn how to DIY Cute Owl out of recycled paper bags. This DIY project is also great for kids, I think they will have a great time!
2 recycled paper bags, colored papers, scissors, pens, glue
The step-by-step tutorial is as follows:
1. First we prepare a recycled paper bag, you can choose the most common paper bag. And cut off the handle of the paper bag.
2. We prepare a piece of yellow paper, use scissors to cut out a shape similar to an eye patch, and use white paper to cut out a shape similar to a gear.
3. Continue to use blue paper and pink paper to cut into circles.
4. On the pink circle, draw the shape of a closed eye.
5. Use all kinds of colored paper, cut it into a circle, fold it in half and put it under the paper bag as the owl’s feathers. And fold out a triangle for the owl’s beak. Take another paper bag and use scissors to cut out the owl’s ears.
6. Use scissors to cut out the shape of the owl’s wings, and draw the pattern of feathers on it. Here you can play your personality freely.
7. Put all parts in the proper position.
8. Make the owl’s feet at the bottom. Such a recycled paper bag owl is complete. Do you like it?
Sharing is Caring:
All about FREE crochet/knitting paterns, DIY projects…