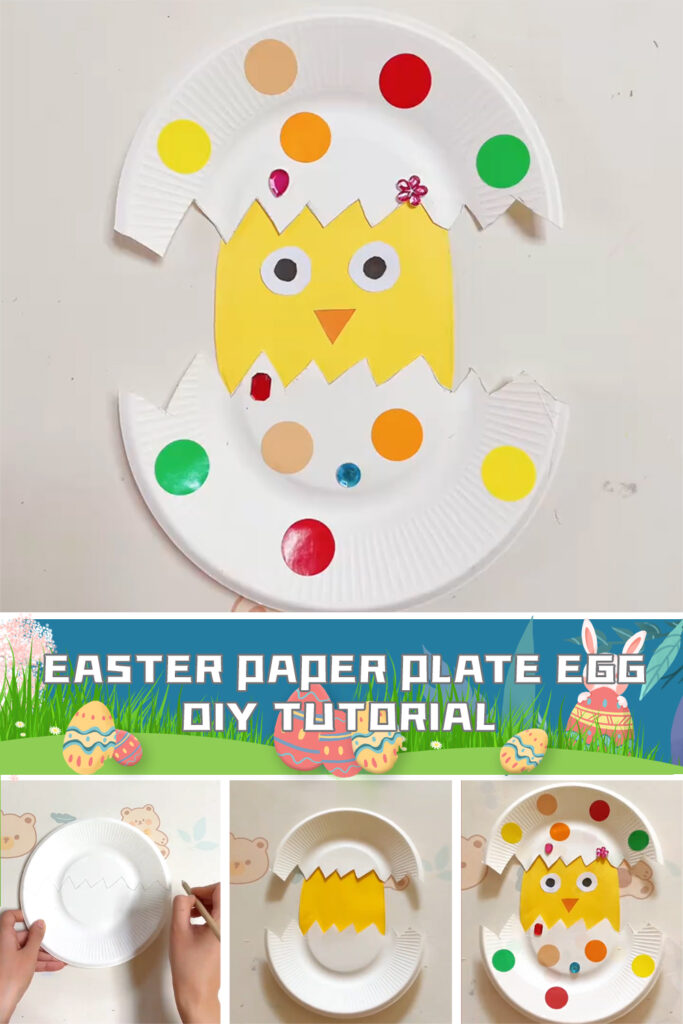
Looking for a fun and easy Easter craft activity? Why not try making these adorable Easter Paper Plate Eggs? Follow these simple steps to create your own festive decorations.
Materials you will need :
Paper plates
Yellow oval-shaped cardstock
Scissors
Glue
Markers or googly eyes
Colorful paper circles or stickers
Instructions:
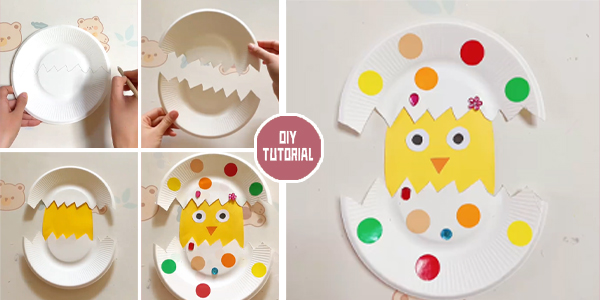
1. Start by drawing zigzag lines on the paper plate to resemble the cracked shell of an egg.
2.Use scissors to carefully cut along the zigzag lines, creating a jagged edge around the paper plate.
3.Take a yellow oval-shaped piece of cardstock and glue it onto the paper plate to cover the center.
4.Next, use markers or googly eyes to decorate the yellow cardstock with chicken eyes, a beak, and any other facial features you like.
5. To add some extra flair, glue on colorful paper circles around the edges of the paper plate to represent Easter decorations.
Voila! Your Easter Paper Plate Egg is complete and ready to display. Hang it up as a festive decoration or use it as a unique Easter-themed serving platter for treats and snacks.
This DIY Easter Paper Plate Egg craft is perfect for kids and adults alike, providing a fun and creative way to celebrate the Easter holiday. Get together with friends and family to make a whole flock of these cute Easter Paper Plate Eggs and spread joy and cheer throughout your home. Happy crafting!

