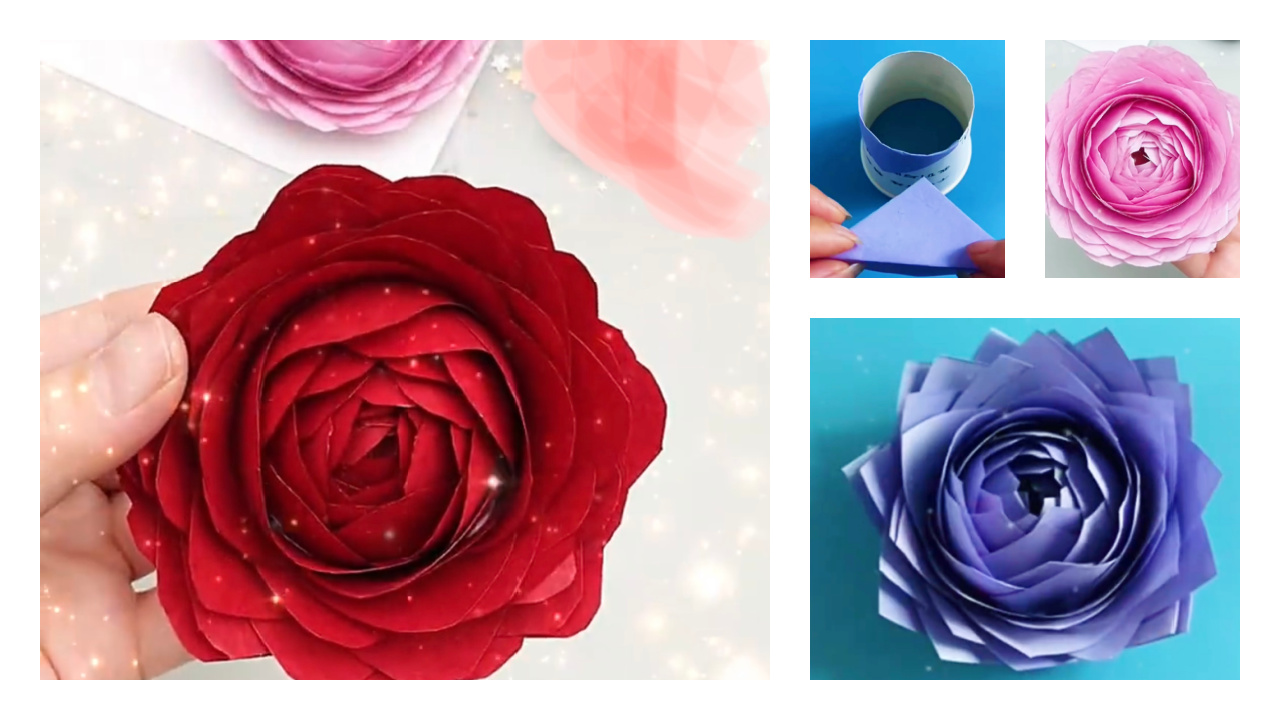
I like roses very much, I like all kinds of roses. How about you? Today we are going to share a tutorial on folding roses. They are so pretty that they can be decorated at home without worrying about them dying. Let’s get started now.
For Easy DIY Paper Rose project, what you will need: square paper, paper cup and glue.

1. First we prepare an 8 OZ paper cup, cut the bottom and put it upside down on the table.


2. Then prepare 30 pieces of colored square paper, the size of the paper is 5.5 x 5.5cm. You can choose the color you like. We first take a piece of paper and fold it in half along the diagonal line once and we will get a triangle. Then put it Open and clamp it to the edge of the paper cup.


3. We repeat the above steps, and fill the triangular paper along the paper cup.


4. To apply glue to the bottom of the paper, put the triangular paper one by one, and repeat this step until all the paper is used up.
5. Turn the paper cup upside down, then you can see a flower, remove it from the paper cup.

Now, a beautiful rose is ready.
We can make many rose flowers, put them in vases or wrap them up as gifts. Do you like it?


[…] You may also like: Easy DIY Paper Rose Tutorial […]
[…] You may also like: Easy-diy-paper-rose-tutorial […]
[…] You may also love: Easy DIY Paper Rose Tutorial […]
[…] You may also love: Easy DIY Paper Rose Tutorial […]