
Origami is a very interesting handmade activity, it is an art activity in which paper is folded into various shapes. Origami originated in China in the 1st or 2nd century AD, was introduced to Japan in the 6th century, and then spread to the world through Japan. Today, we are going to share a DIY origami mini tote bag tutorial.
1. First, we prepare a square piece of paper, you can choose the color you want and fold it in half. 
2. Continue to fold in half in the other direction. 
3. At one end of a corner, fold to the middle point. 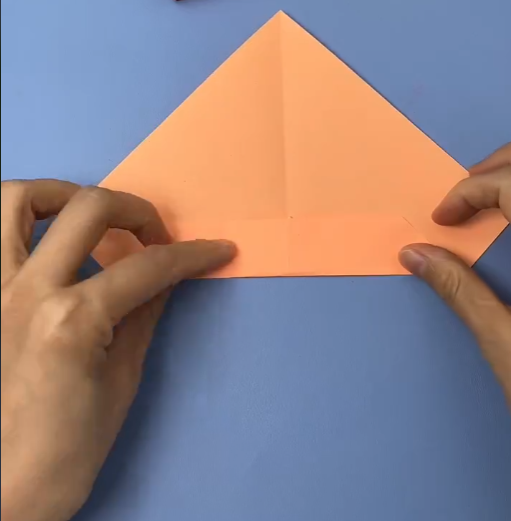
4. Continue on this basis and fold to the middle point again. 
5. Repeat the above operation in the other direction.

6. Then we opened the paper and got a creased piece of paper.

7. We fold in half again.

8. Fold the bottom edge of the triangle up.

9. Fold the right edge to the middle.

10. Fold the left edge to the middle.

11. Unfold the sheet again and fold one corner to the middle according to the crease.

12. Do the same steps as above for the opposite corner.

13. Unfold and fold inwards according to the crease.


14. Fold the exposed sides inwards. 
15. Follow the crease to form this look. 
16. Fold the exposed sides inwards. 
17. We use thin strips of paper to make the handle of the bag. 
18. Finally, we use the brush to draw the pattern we like. Such a small and cute tote bag is ready, I hope you like it and have a good time!
You may also like: How to DIY Cute Caterpillar with Orange Peel


[…] You may also like: DIY Origami Mini Tote Bag Tutorial […]
[…] YOU MAY ALSO LIKE: DIY Origami Mini Tote Bag Tutorial […]
[…] YOU MAY ALSO LOVE: DIY Origami Mini Tote Bag Tutorial […]
[…] YOU MAY ALSO LOVE: DIY Origami Mini Tote Bag Tutorial […]
[…] YOU MAY ALSO LOVE: DIY Origami Mini Tote Bag Tutorial […]