This is a very creative craft – DIY rainbow umbrella. These little umbrellas look so small and cute, your little ones will love them. Let’s spend quality parent-child time with our children.
For this DIY Paper Rainbow Umbrella project, materials you will need:
Colored paper, double-sided tape, scissors, pen
1. First, we use a circular tool to draw a circle on the paper. 
2. Cut the drawn circle with scissors. 
3. Fold the cut circular paper in half. 
4. Fold in half again. 
5. Put double-sided tape on the folded surface.

6. Then fold it in half to make the double-sided tape and paper stick firmly.

7. Put double-sided tape on the paper.

8. Then repeat the above steps. We can take it with a variety of different colors of paper. Double-sided tape must be in the same direction.

9. We glue the finished papers of various colors together layer by layer.

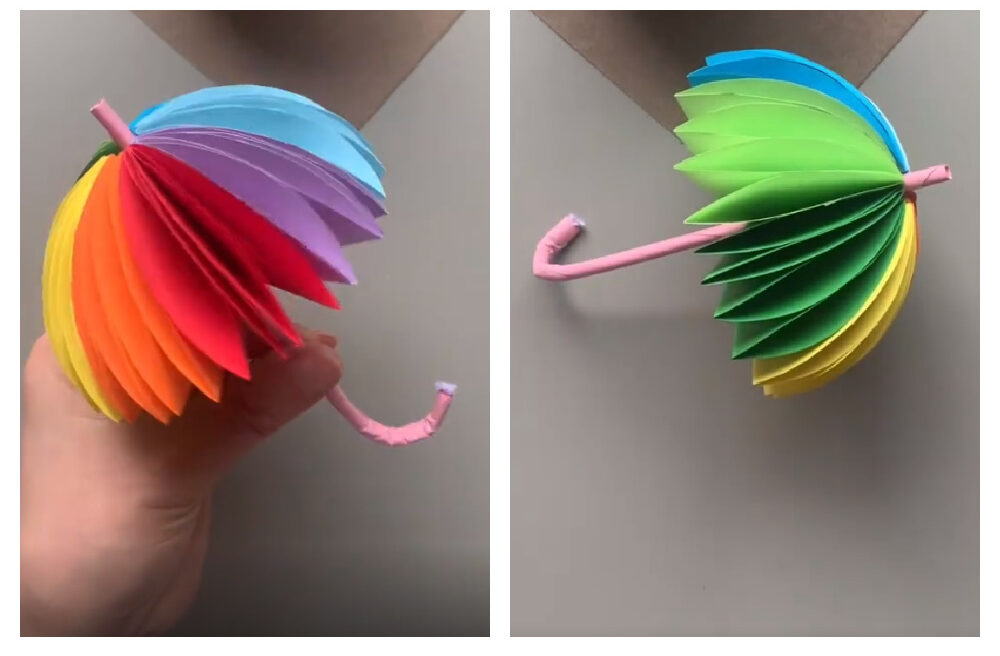
10. We glued all the colored papers together.

11. We are using other paper to make the handle of the umbrella.

12. We roll the paper into a straw shape.

13. Apply double-sided tape to the cross section of the colored paper that was glued together earlier.

14. Paste the umbrella handle we made with the previous cross section.


15. We open the colored cross-sections and paste them together. 
16. Cut off the excess umbrella handle. 
17. Then bend it and glue it together.
18. In this way, our small handmade paper umbrella is ready. Do you like it?
You may also like: DIY Origami Mini Tote Bag Tutorial


[…] You may also like: DIY Paper Rainbow Umbrella Tutorial […]
[…] You may also like: DIY Paper Rainbow Umbrella Tutorial […]